How to Create Unforgettable DIY Envelope Liners for Your Wedding Invites
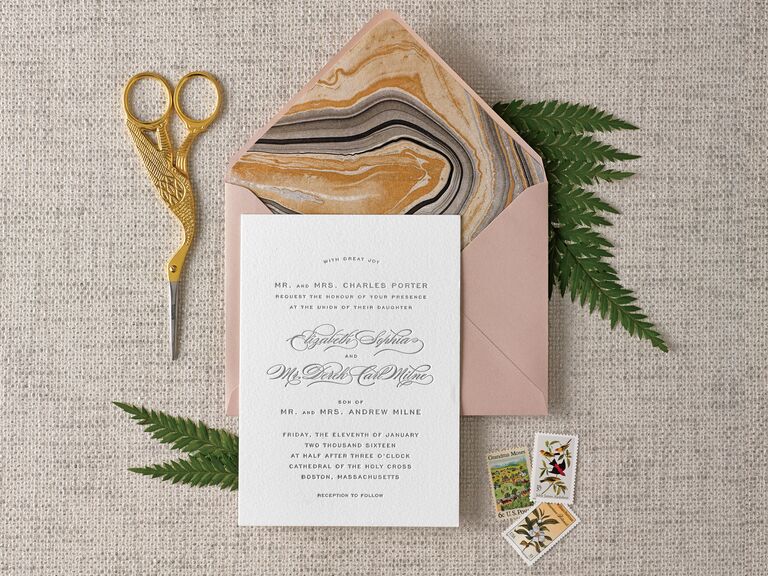
Tackling some of your wedding projects yourself can help save money while being a fun way to gear up for your day. One of our favorite ways to elevate your invitation suite is with DIY envelope liners. This is a simple but effective way to add some extra style and color to your guests' mailboxes while showcasing your wedding theme. Of all the wedding stationery trends, this is one of the easier tasks if you're still deciding what to DIY for a wedding.
We spoke with wedding expert Mel Sallese of Haven 33 Creative, who has a decade of design experience in wedding and event invitations. She says, "My favorite tip to remind couples of is that their invitation is the first look guests will have at what their wedding will be like. So, adding an envelope insert with a fun pattern and colors to match the theme will make it even more exciting for guests as they open the invitation." She offers even more cost-saving tips and tricks that will make your invitation envelopes memorable. Let's dive right into the ways you can DIY wedding envelope liners for a more magical touch.
In this article:
- Cost of DIY Wedding Envelope Liners
- Where to Find Affordable Envelope Liners
- What Kind of Paper Do You Use for Envelope Liners?
- How to Make Envelope Liners
Cost of DIY Wedding Envelope Liners
According to Sallese, you should factor in the paper cost for envelope liners and whatever tools to cut and adhere them to your envelopes. That means you'll buy at least the correct size of envelopes for your invitations, patterned paper for the liners, adhesive, paper cutting tools and whatever embellishments or extras you want to add. Paper cutting tools "can range from $10 to $30 for a good, lower-cost tool," according to Sallese. As for another way to save money, she says, "If buying envelopes directly from the manufacturer… you can plan to pay around $.10 to $.25 per envelope." Overall, you could spend around $30 to $50 or more for your DIY envelope liner supplies, especially if you utilize sales and savings from craft stores.
Pro tip: Use The Knot Budget Tool to learn more about wedding budgets (including the average cost of invitations) in your local area.
Where to Find Affordable Envelope Liners
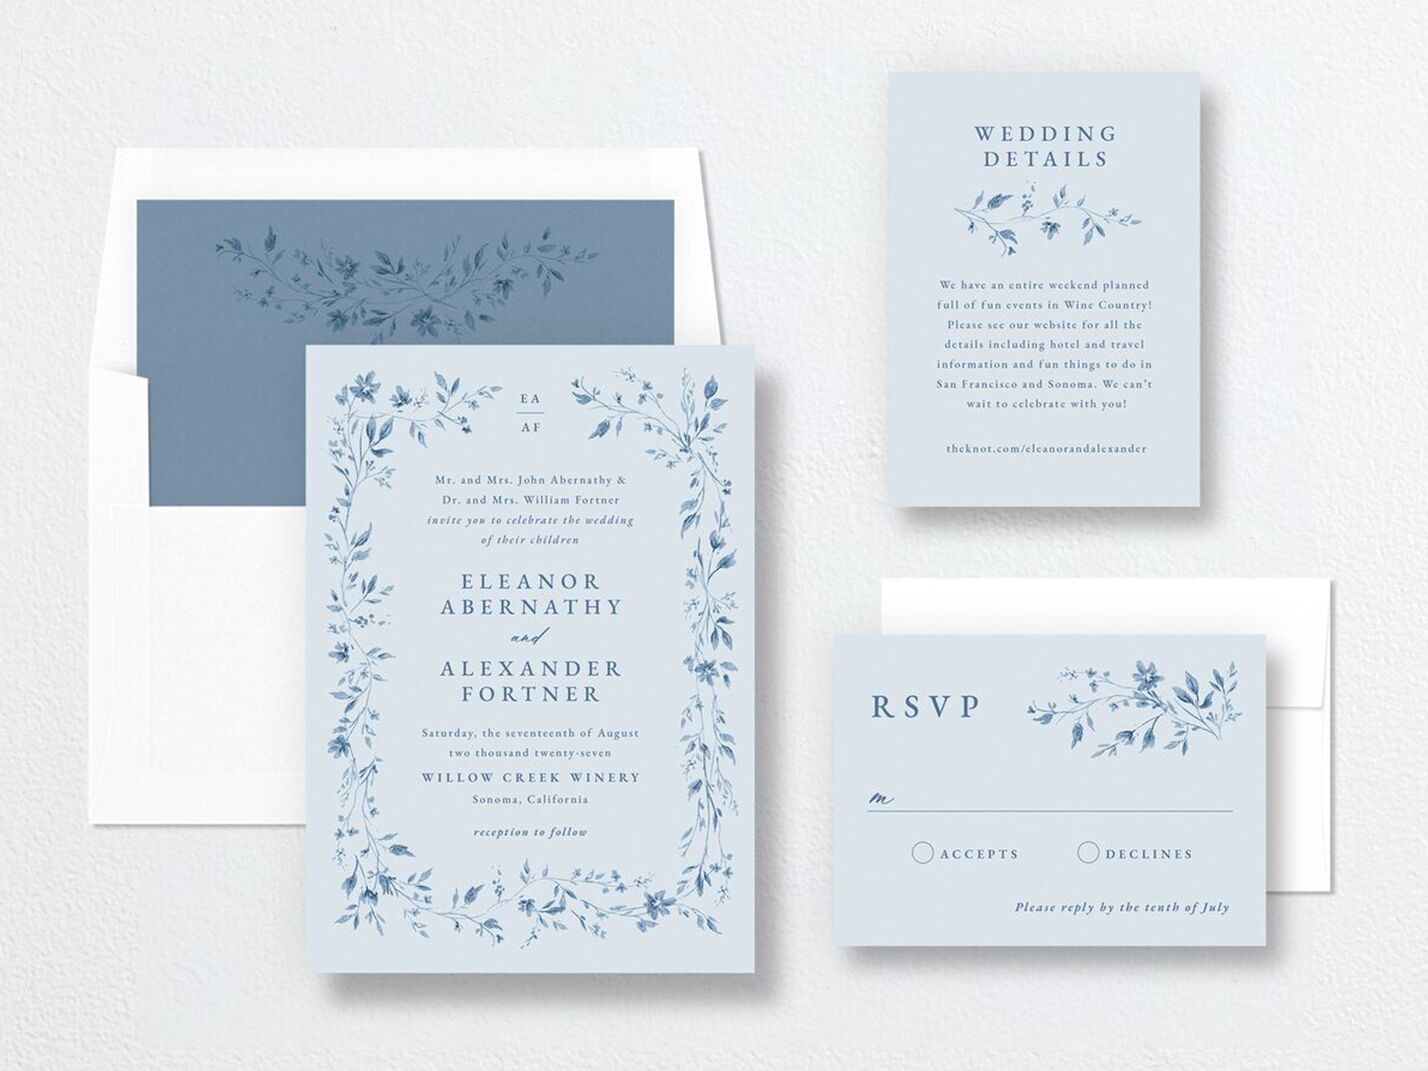
For finding budget-friendly paper to make your envelope liners, Sallese says, "[You] can find endless amounts of beautiful/fun/funky patterned, solid color or even glitter paper at big box craft stores like Michaels, or on a smaller scale, an art materials store that sells bookmaking supplies." Or, if you prefer ready-made envelope liners, then consider The Knot Paper's wide selection. You can filter by your invitation suite and by different design styles and price ranges. They come with a peel-off adhesive strip that takes care of the work for you, and there are many themes to choose from, including floral, Regency, modern and so much more.
What Kind of Paper Do You Use for Envelope Liners?
Using the right paper for your envelopes is a must, especially since you still have to insert your invitation suite inside. Be sure to go through your wedding stationery checklist to ensure everything (including liners) will fit. Our invitation expert, Sallese, says, "It's best to choose a thin paper so it doesn't take up too much room and the envelope will also be easier to close. A good paper thickness would be something similar to the everyday office printer paper." The Knot Paper also has precut designs that fit in a variety of envelope styles and sizes. You can even order various designs to mix and match if you want something a little more creative.


How to Make Envelope Liners
Whether you're cutting your own liners or buying from The Knot Paper, this is one project that is well worth the effort. Just follow these simple steps to learn how to DIY envelope liners in a jiffy.
Buy Your Supplies
Before getting started on your envelope liner journey, ensure your invitations and envelopes will fit. Sallese says, "A traditional wedding invitation size would be 5 x 7 inches [w]hich would make the envelope size 5.25 x 7.25 inches (also called an A7 envelope). So don't forget to consider the size of your envelope (plus the flap) so you can plan how much paper to buy for the insert."
Choose a Style/Design
The Knot Paper has over 800 envelope liners to choose from, meaning you can find any design or style to fit your wedding aesthetic. You can even filter by price range, color theme, season and photo options for a truly custom experience. Each liner description also details the size so you can be sure they fit your envelopes before purchasing.
Customize Your Liners
The Knot Paper allows custom options, like your own photos or wedding information. Personalize your liners by including your initials, wedding date and much more. Plus, you can also order a batch of free samples before purchasing to get a better feel of how the liners will look in your envelopes. (It's also helpful to visit The Knot Invitations FAQs for all you need to know before ordering your invites, liners and other paper essentials.)
Assemble Your Envelopes
Since The Knot Paper's envelope liners come precut with adhesive, half the work is done for you in this DIY project. (What a relief, right?) Depending on how many envelopes you have to assemble, it may be a fun idea to gather some of your wedding party or your future spouse to help. Turn it into a bonding experience, complete with some energizing snacks or a bottle of wine.
Insert Your Invitations
Once you've finished adding the envelope liners, try them out with your inserted invitations. This will help give you an idea of the completed look your guests will see in their mailboxes. Then congratulate yourself for saving some money while adding an extra touch of elegance to this DIY wedding design.

