Can You DIY Wedding Menu Cards? Where to Find Inexpensive Options
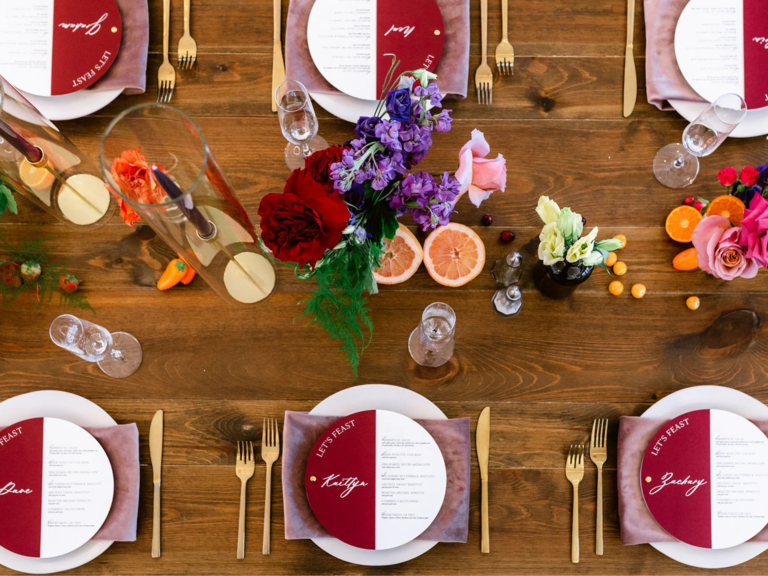
If you're too busy meeting with caterers, test tasting and dreaming up wedding food ideas to even think about how you'll convey to your guests what they'll be eating, you've come to the right place. DIY wedding menu cards are a fun, easy and beautiful way to present what's in store for the night's fare to guests—plus, they can be a more affordable option if you're on a budget (which you can calculate using The Knot Budget Tool).
We've got everything you need to know on where to find do-it-yourself wedding menus, how to make them and what to write on them, plus other general tips you're probably not even thinking of! When you're done soaking up all the inspo and advice, be sure to check out these wedding escort card ideas and wedding place card ideas to round out your paper goods checklist.
In this article:
- Where to Find Inexpensive Wedding Menu Cards
- How to Write a Menu Card for a Wedding
- Tips for Making Your Own Wedding Menu Cards
Where to Find Inexpensive Wedding Menu Cards
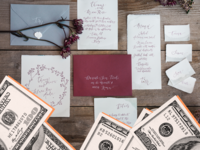
When the typical cost of wedding invites runs nearly $400, who can blame you for wanting to stick to a budget when it comes to your other paper goods? Printable templates save time and still achieve a professional look, says Kelly Jeanmaire, wedding planner and owner of The Main Event by Kelly. And, they tend to be more affordable—you can find some inexpensive wedding menu cards here:
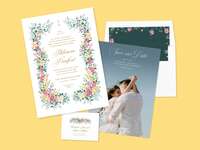
- The Knot Paper: We might be a little biased, but The Knot Paper is an excellent source for wedding menu cards, with more than 600 options to choose from. Filter by design styles, ranging from destination to regency, and price ranges to complement your invitation suite.
- Etsy: With options from sellers and artisans all over the world, Etsy is brimming with original and unique wedding menu cards. Etsy wedding menu cards also run a gamut of prices, so you're bound to find something in your budget. Some even cost less than $1 each.
- Papier: Whether you're looking for an abstract design for your art gallery reception or a floral pattern befitting your garden wedding, Papier's got an option for you. There's even an option to upload your own design.
- Zazzle: We love that Zazzle has circular wedding menu designs in addition to the traditional rectangular ones for some unexpected fun. The marketplace allows you to filter your search in multiple ways so you can find your dream design among its 40,000-plus options.
- Minted: Minted is a go-to for wedding stationery, and for good reason. It sources art from more than 16,000 independent artists from around the world, meaning there are plenty of beautiful options to choose from—and they're easy to customize the color palettes, too. And they offer more than 1,000 designs of affordable wedding menu cards.
How to Write a Menu Card for a Wedding
Now that you've got your favorite design picked out, how should you write a wedding menu card? Include the food details, of course! But there's a little more to it than that. Follow this step-by-step guide, and you can always look at some wedding menu examples for a little bit of inspiration.
- Head to The Knot website and click the "Invitations" tab.
- A drop-down menu will appear displaying categories. Select "Menus."
- On the left-hand column, filter your search according to "Price Range," "Design Style," "Foil," "Season" and "Number of Photos."
- From there, head to the "Sort By" drop-down bar in the upper right-hand corner to organize results by "Featured," "Price (high to low)" or "Price (low to high)."
- Click on the image of the invitation you like the best.
- Customize your invitation by selecting a design color, paper type and quantity.
- Select the pink "Personalize" button to start writing out your menu.
- For a seated dinner, begin with the first course. "Appetizers," "Bites," "Hors d'oeuvres," "First Course," "Nibbles" and "Starters" are a few wording options for this, which can serve as a heading. List out the food options that will be served underneath in a smaller, different font to provide a typography contrast.
- If you're serving salad, you can include it under the first course or give it its own heading, such as "Salads" or "Greens"—we recommend this if you have more than one salad option and multiple appetizer options. Depending on when it's served, this will be your first or second entry.
- Move on to the next course, which you can label directly as such or as "Entrees," "Plates," "Feast" or "Mains" before listing what are typically meat, fish and vegetarian options underneath.
- End with the third course—dessert. That can be the heading for this category, or you can opt for "Treats" or "Sweets." You can also make the wording more specific depending on the dessert type, such as "The Cake," "Cookies," "Donuts," etc. List the desserts, or various flavors, underneath.
- You can follow the same steps for a family-style dinner. The only difference is that you'll want to use the word "or" in between food options for a seated dinner; the lack of this word for a family-style menu implies that all listed options will be used.
- You can follow a similar suit if you're having a buffet—but you might want to shy away from direct wording like "First Course" or "Second Course" since the food is served all at once. Instead, opt for wording that more clearly segregates the categories, like "Mains" and "Appetizers." You can even add a "Sides" in there.
- Include any allergy notes, like "GF," "contains nuts," etc. Jeanmaire says this lets guests know what is safe for them to eat.
Tips for Making Your Own Wedding Menu Cards
As anyone who has ever worked on a creative or design project knows, it's not always smooth sailing. Take your time with a do-it-yourself wedding food menu, and it will come out looking like a professional did it. Jeanmaire shares her top tips on how to make a menu card for your wedding:
- Start early. "DIY projects can take longer than expected, so it's always good to start the design and creation process well ahead of time to avoid stress," she says.
- Use texture. Combining materials like vellum, wax seals or ribbons creates a luxurious touch, says Jeanmaire, adding that kraft paper, acrylic and fabric can create a distinctive, rustic or modern look. "There are so many materials around, just be playful!"
- Proofread thoroughly. Get a second set of eyes to make sure there are no errors in the dish names, descriptions or special dietary information.
- Test print. "Always print a sample before committing to printing the whole batch to check for print quality, color accuracy and alignment," Jeanmaire says.
- Consistency. Make sure the style of the menu matches the overall wedding theme, including fonts, colors and any other design elements.
You'll feel so inspired when you're done, that you'll want to check out what else you can DIY for your wedding.


