


Venus Williams is in love (no, not that kind). In her first joint print interview with husband Andrea Preti, the newlyweds open up about their multiple weddings, the moments that mattered most and what greatness means in marriage.
Updated Apr 28, 2026How to Tie a Bow Tie in 9 Easy Steps
Master this menswear essential with our expert's foolproof instructions.
THE KNOT ORIGINAL VIDEO
Okay, so you've mastered the art of tying a tie but what about bow ties? Perfecting the latter is as crucial a skill to have in your style arsenal as the former. And if you're over the age of five, there aren't many sartorial sins greater than sporting a pre-tied number or a clip-on. Bow ties are a great styling choice for certain types of suits as well as a necessity for black-tie weddings (when you'll be wearing a tuxedo). Knowing how to tie a bow tie well can not only help to add a bit more panache to your wedding fits but score you major points with, say, fellow groomsmen who could use a helping hand. Read on for everything you need to know about how to tie and style the beloved bow tie.
In this article:
How to Tie a Bow Tie: Easy Step-By-Step Instructions
Ready to tie a bow tie? You've come to the right place. Just follow these simple instructions to nail one of the great suit accessories in your arsenal.
Before You Tie
If you're traveling with your tie, you should roll it up rather than fold it. This helps avoid wrinkles. Consider steaming your tie before tying it. If it's gotten wrinkled this will help smooth it out and get it ready to wear. Plus, wrinkles can make tying it a little more unwieldy–get ahead of this by giving it a quick steam. Make sure that all stitching and tags in your tie are face-down when you place it around your neck to tie.
Step 1: Put On the Tie

Illustration by Natalie Romine for The Knot
Place the tie around your neck and under your shirt collar. Make sure the right side of the tie is about 1.5 inches longer than the left.
Step 2: Cross the Tie
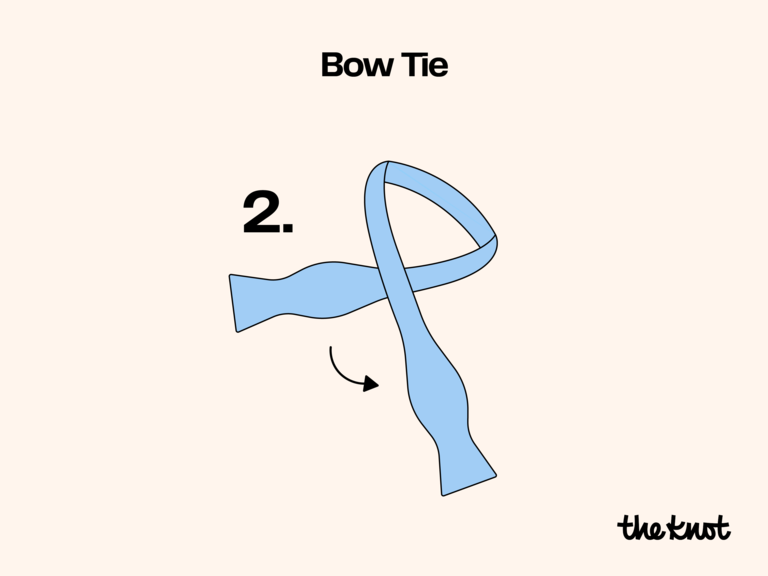
Illustration by Natalie Romine for The Knot
Cross the longer end of the tie over the shorter end.
Step 3: Make a Loop
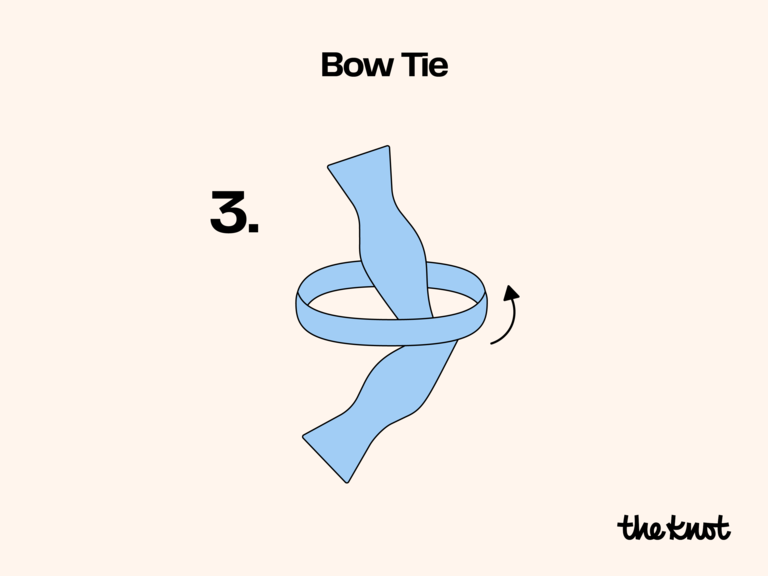
Illustration by Natalie Romine for The Knot
Loop the longer end of the bow tie through the neck hole. Adjust the tightness of the tie so that it fits comfortably.
Step 4: Move the Longer End
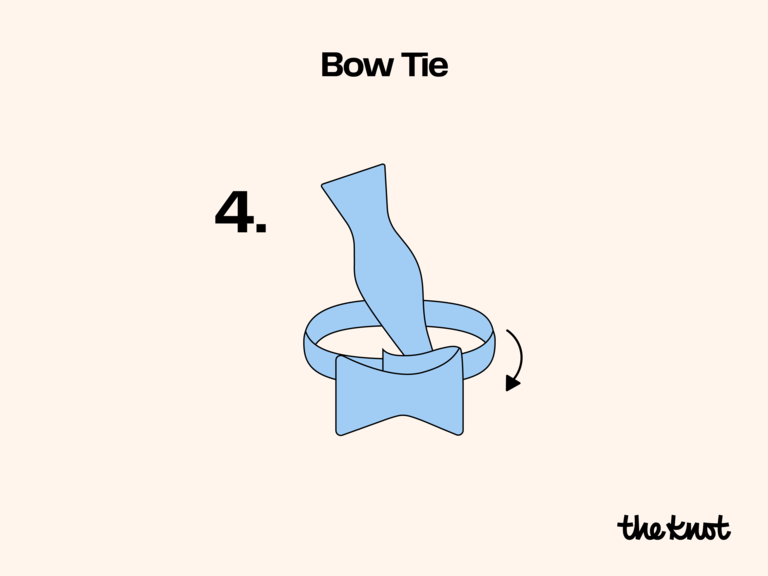
Illustration by Natalie Romine for The Knot
Putting the longer end aside by flipping it up over the shoulder, double the shorter end at the widest part so it resembles a bow and lays sideways across the collar.
FOR YOU

27 Best Unique Wedding Bands for Women in 2023
These uncommon options will bring your engagement ring aesthetic full circle.
The Best Something Blue Jewelry to Keep With Tradition
Something old, something new, something borrowed, something blue…
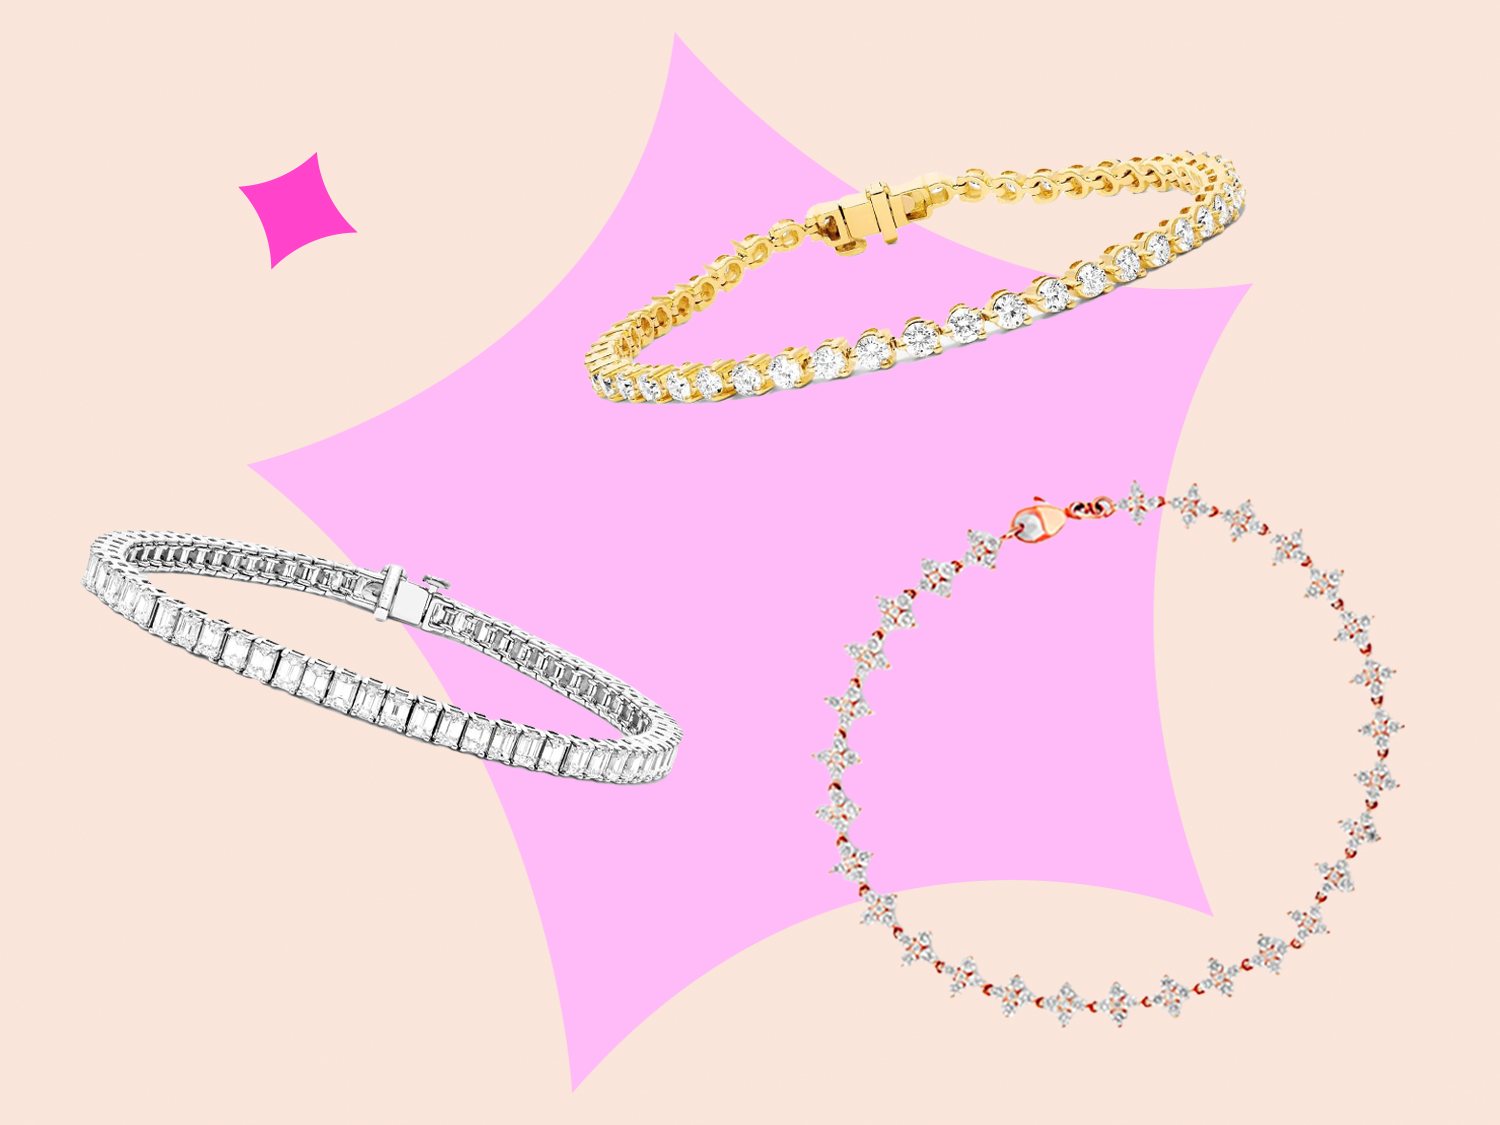
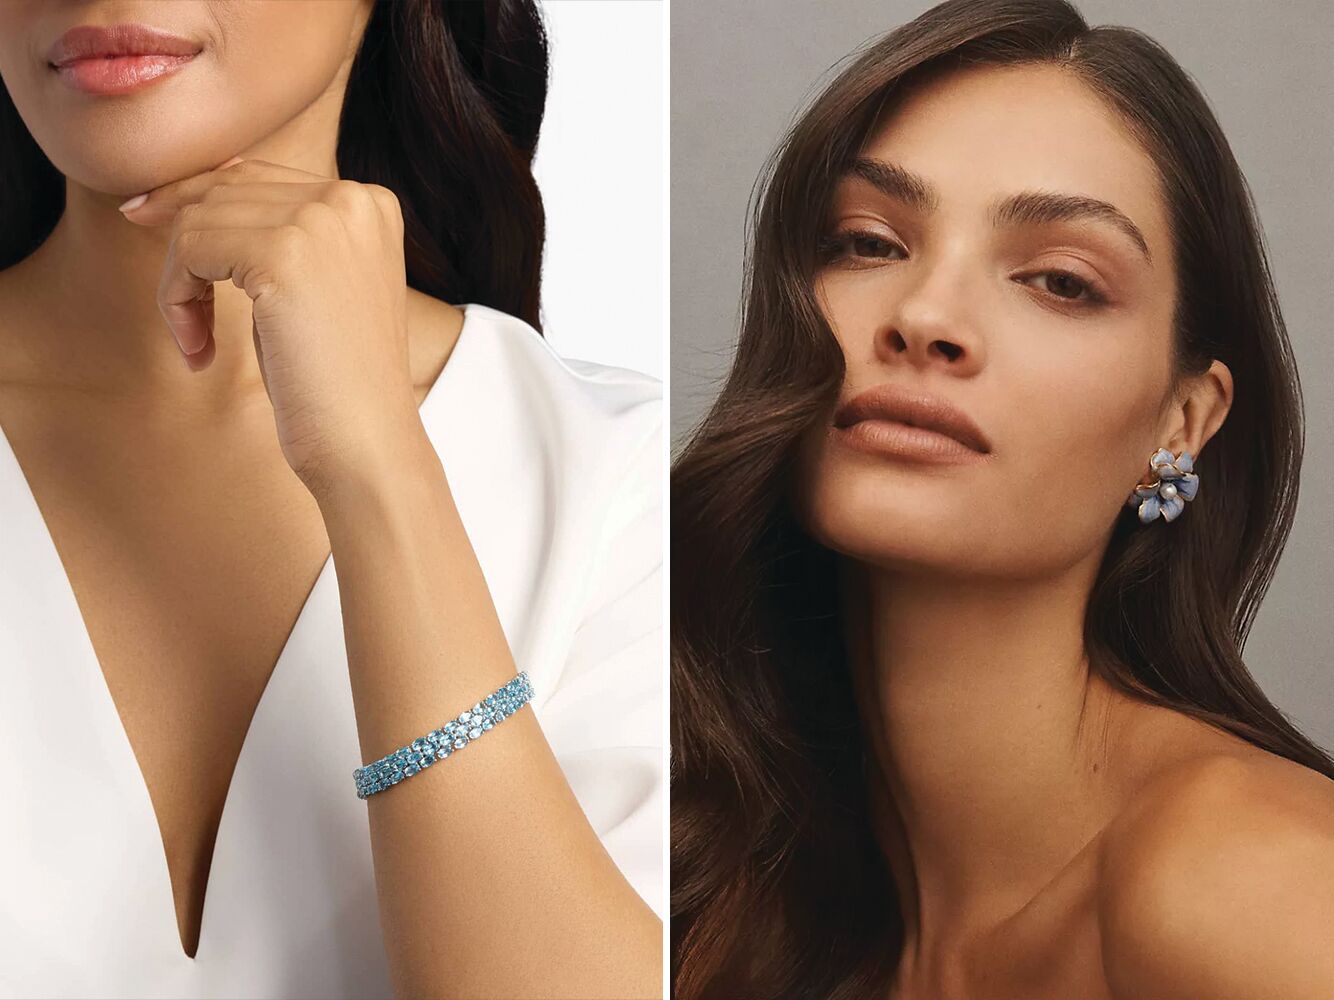
The 15 Best Wedding Bracelet Picks of 2024
Arm candy, but make it bridal.
Step 5: Make the Bow
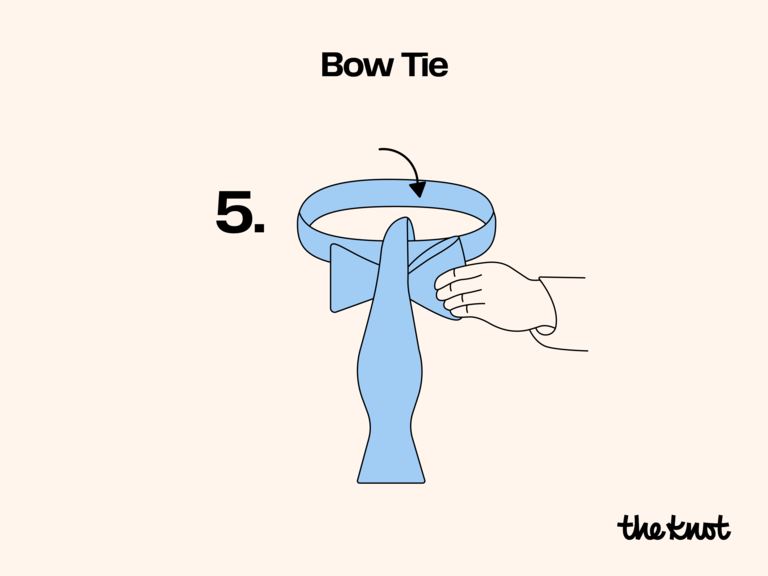
Illustration by Natalie Romine for The Knot
Holding the bow shape with one hand, retrieve the other end, and pull it down over the center of the bow shape with the other hand. At this point, the tie resembles a bow tie from the front.
Step 6: Pinch and Pull
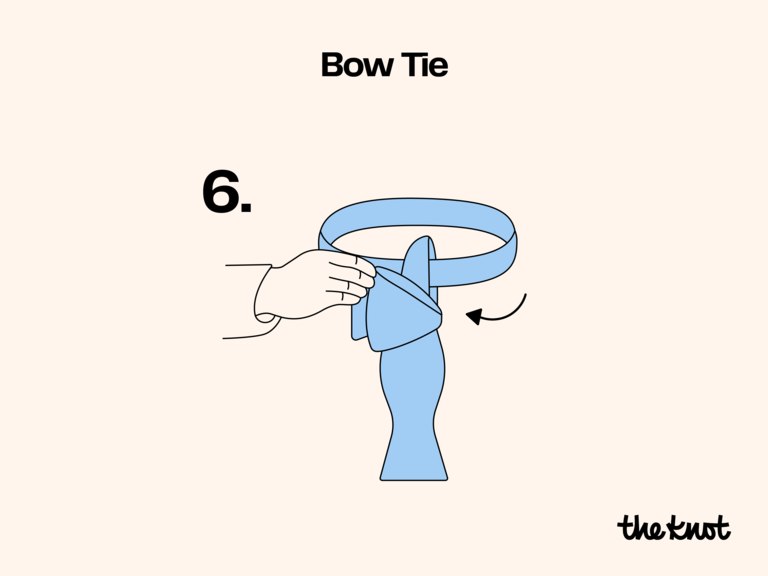
Illustration by Natalie Romine for The Knot
Bring the sides of the bow together in front with one hand; pinch them and pull. This creates a hole behind the bow.
Step 7: Make Another Bow
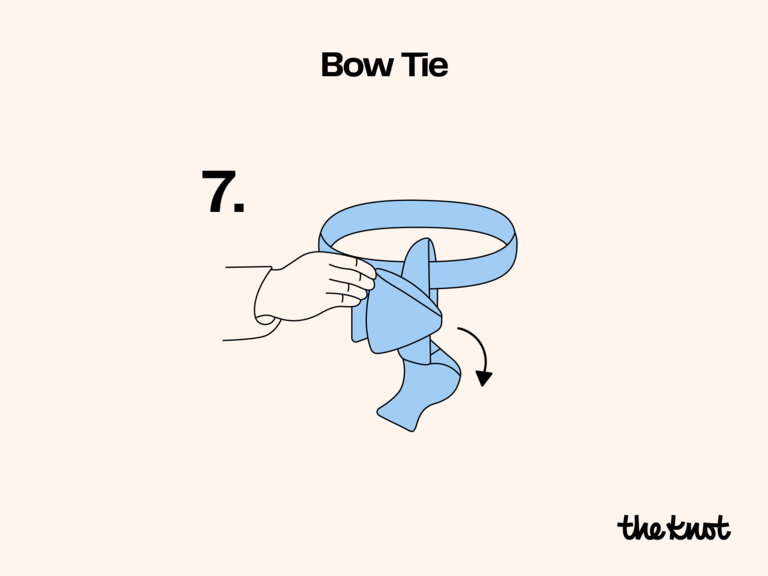
Illustration by Natalie Romine for The Knot
Use the other hand to make another bow with the longer end of the tie by doubling it like the first bow.
Step 8: Push the Bow
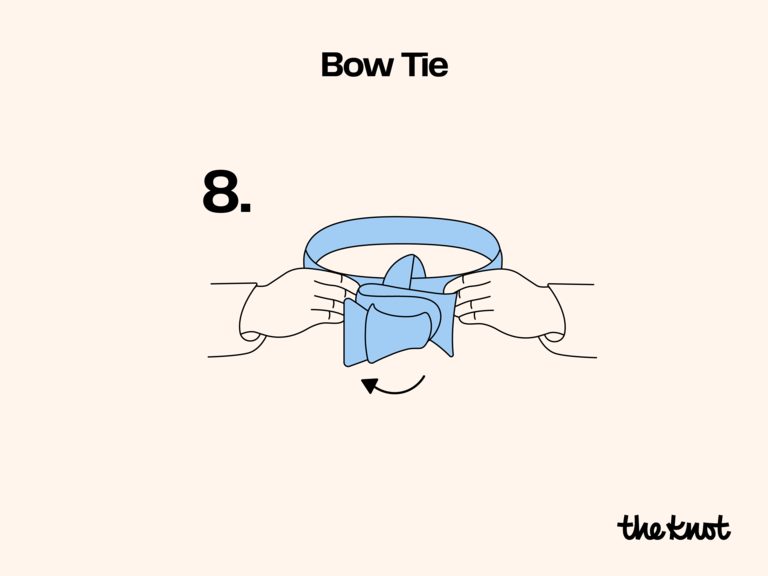
Illustration by Natalie Romine for The Knot
Push this bow through the hole.
Step 9: Finish It Up

Illustration by Natalie Romine for The Knot
Pull on the folded ends of each bow to tighten the knot of the bow tie.
How to Tie a Bow Tie on Someone Else
Helping someone out with their bow tie? It's a pretty simple task–you're just going to follow the same steps listed above, albeit mirrored. For instance, when you first put the tie around the tie-wearer's neck, the left side should be 1.5" longer rather than the right. From there, the process is the same.
Tips for Tying a Bow Tie
Now that you've got the basics down, let's take the next steps. Here are some handy tips and tricks for tying the best bow tie you can–and wearing it well.
Practice Before the Event
Nobody likes to be in a rush the day of a wedding, and especially not if that rush is due to fumbling your tie knot. Practice ahead of time to make sure you've got your bow tie knot on lock.
Use the Right Tie
As with all things in suiting, bow ties are all about proportions. If you're wearing a spread-collar shirt with wide collars, a smaller bow tie isn't going to look quite right. The same goes for a big tie on a shirt with smaller collars. Make sure your tie is the right size for the shirt you're wearing.
Measure It
In terms of neck fit, a bow tie is pretty easy to size. You're going to want to get your neck measurements and then just add 19 inches. Your ideal bow tie length is this number.


