Everything You Need to Know About Nailing Your Wedding Manicure
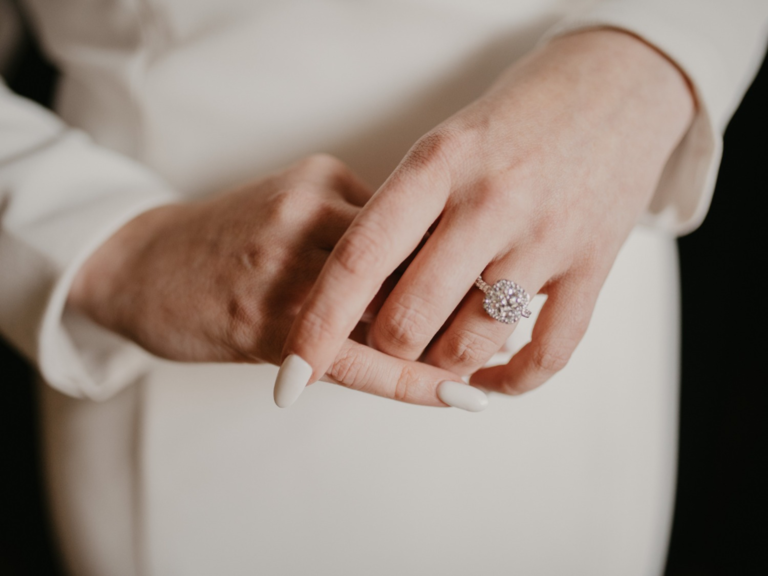

Among the (many!) various beauty decisions to make and vendors to book, hair, makeup and skincare tend to get most of the attention in the planning process–but you might also be strategizing your wedding manicure, too. From polish hue and type, to who's glamming up your hands (and possibly feet, too) before walking down the aisle (...and when it's all happening), there are plenty of details to consider when it comes to your wedding nails, and we've got your covered with expert intel for fl
First and foremost, there is no "perfect" or "best" when it comes to wedding-day nails: "Brides should always prioritize what suits their personal preferences for their wedding day," says Mazz Hanna, celeb nail artist and co-founder of L.A.-based nail artist agency, Nailing Hollywood. But whatever you end up choosing, flawless digits can really pull the whole look together, explains San Sung Kim, an artist with Nailing Hollywood: "The bridal manicure plays an important role in elevating the overall look on the bride's wedding day."
In this article:
Perfect Wedding Nails in 5 Easy Steps
Ready to get started? Here's everything you need to know so you can easily nail your wedding-day nails, with lots of savvy tips and inspo from the pros.
1. Consider Your Wedding Theme
In addition to your other beauty and fashion choices (i.e. hairstyle, dress, jewelry…), your wedding theme, if you have one, can help inform your bridal nail aesthetic, if desired. "It's always a great idea to tie your manicure color for your wedding day into whatever color scheme or setting your wedding is," Mazza says. "Deep reds and darker tones can be a beautiful choice for wintertime weddings. If you're afraid of picking something too bold, neutrals are perfect for any wedding setting and that is why they are so popular."
2. Choose Your Wedding Manicure Type
Wedding day mani or not, your preferred type of nail polish is a totally personal preference. Hanna says most wedding clients tend to get gel manicures for the big day, and notes "Russian manicures are also an incredible option for weddings—it is an amazing service that will leave your nails looking better than ever," she explains. Opt for gel or acrylic services if you're "looking for longevity and strength," Kim says, but if you're more interested in talons you "can switch up easily, lacquers or press on nails may be the best option," she adds.
3. Pick Your Wedding Nail Color, Shape and Style
"Rounder, more natural shapes and neutral tones" tend to reign supreme for brides, Hanna says, especially a medium-length soft almond shape. Besides a soft almond shape, Kim suggests "a shorter round or squoval shape" if you're going for a classic feel–for a "bolder look," Kim says "any length" works well.
In terms of wedding mani colors, Hanna most frequently uses soft nudes and pale pinks like OPI Funny Bunny, Bubble Bath, or Put It In Neutral on bridal clients, and "classic French manicures are also extremely popular for weddings," Hanna explains. "Many brides tend to match their nails to their wedding dress to create a cohesive look," Kim says.
Design wise, you can never go wrong with adding a touch of glitter either to a nude or pale pink manicure, or a french manicure, to make things a little less conventional and a little more fun," Hanna says. Kim also says variations on a French mani simply "never go out of style for brides." If you're looking for a somewhat "less conventional design," Kim suggests adding "feminine elements such as lace or florals," or an unexpected chrome accent, to "spice up" a classic nude or pink mani. Your nails can even be a canvas for something sentimental, Kim suggests, by "incorporating wedding colors, details in the wedding venue, or elements that are special to the couple" into a subtle but meaningful design, whether as an accent nail or on all 10 fingers.
Besides a hit of shine on a neutral canvas, Kim notes a current wedding beauty trend is to "play with color by opting for milky versions of the standard hue" on nails. For a winter wedding Kim also loves "darker tones to match with the ambience of the season" (which she notes can appeal to or "bolder bride" no matter when the big day is).
4. Find a Pro Who Does Wedding Nails Near You
Besides figuring out your ideal wedding nail vibe, you'll want to choose and book the right pro for the job. Perhaps you have a go-to nail salon that you'd trust to beautify your digits for the big day–if not, research local manicurists on social media and online, checking out reviews– If you already have hair or makeup vendors booked, ask for any nail technician recs.
You can even schedule a trial ahead of the wedding, which Hanna highly recommends if possible: "it's just as important as doing a hair or makeup trial," Hanna says, for many reasons: "You get to know your nail artist, see if you like their work, and perfect the look you want before the day of your wedding so that you know exactly what to expect," she adds.
Hanna recommends scheduling your nail, hair and makeup trials around the same time so "you can see the entire look together" in advance of the big day, Hanna says, especially "if you can do them all within the same week or day–that's even better!" Ideally, Hanna recommends doing your nail trial first, "then a few days later go for your hair and makeup trial on the same day." (If a spray tan trial is also on your pre-wedding to-do list, Hanna says to first do that before any other glam trials.) That said, there are a lot of expenses and limited time in the months and weeks pre-wedding, so if you can't make a mani test-run happen, don't worry; Kim says they're helpful but "not necessary," and if you are doing a trial, she recommends booking it one to two months before walking down the aisle.
Another decision to, well, nail? Whether or not anyone in your wedding party will get polished at the same time or not, and if so, how to navigate stress-free scheduling. When coordinating group manis, Kim suggests hiring a nail tech (or team, depending how big the bridal party) to work on-site on the wedding morning, wherever you're getting ready, along with hair and makeup vendors. The ideal scheduling strategy, per Hanna, is to outsource those logistics (because you probably have more than enough to coordinate as is!): "I always recommend hiring a wedding planner, they are absolutely essential in planning or schedules for events leading up to the wedding and the wedding itself," Hanna says, and that includes nailing a stress-free, realistic schedule of manis, so everyone from your MOH to your MIL–and, obviously, the bride to be–are taken care of.
If you're not working with a wedding planner, Hanna recommends "renting or booking out an entire salon space for a private pre-glam wedding party" (especially if your getting-ready location is more intimate). Besides exploring options locally that could accommodate a group, Hanna suggests checking out MiniLuxe, which has studio locations in multiple states.
5. Decide When to Get Your Nails Done Before Your Wedding
For regular polish, "you may want to consider getting your manicure the day of your wedding, along with your hair and makeup, to prevent any chipping," Hanna says. With gel or acrylic, "scheduling the wedding manicure as close to the wedding day will be the most ideal to keep the nails in the best condition as possible," Kim adds. If the prospect of scheduling and getting a wedding mani elicits more stress than spa vibes for you, Kim says to multitask your glam to save time, by booking a "nail tech to do their nails on the day of while the bride gets their wedding glam done."
In terms of your broader pre-wedding beautifying timeline, Hanna suggests first doing hair cut (and color, if applicable), then a facial (before a spray tan, if you're planning on that, "to ensure moisturized and freshly exfoliated skin," she says), followed by spray tan, then nails. And, if you've been faux-bronzed, "make sure your nail artist does not use any scrubs, oils, or lotions that may ruin your spray tan" Hanna says–ideally, a dry (water-free) nail service is smartest for preserving your UV-free glow's "even color."
If hair color treatment is in the mix, it's key to schedule that before your mani, Kim says. "If the bride is working with any dyes in their pre-wedding glam routine, it would be best to receive those services before they schedule their manicure. Nail polishes are susceptible to staining and chipping, so keeping them in their best state will require some meticulous planning."
5 Wedding Manicure Mistakes to Avoid
Once you've sorted out the perfect color, shape and type of mani for your big day–plus when and where (or by whom) it's happening–here are a couple more nail-related pointers to keep in mind…
1. Ignoring Your Feet
If you're wearing sandals or other open-toe wedding shoes, consider whether you also will want to slot a pedicure into your pre-wedding glam timeline. A gel pedicure can be done a bit further in advance since it's more durable and resistant to chips and scuffs, while a pedi done with regular polish should happen within a day or two pre-wedding if possible.
2. Not Discussing Bridesmaid Nail Colors
Decide if you'll be giving any guidance on your bridesmaids' nails, such as colors you'd prefer (or not!). "I think this is a fully acceptable thing to do," Hanna says. Want to provide nail hue parameters without feeling like a bridezilla? "You can easily include that conversation when they are discussing the colors of bridesmaid dresses," Kim says, if you're opting for a certain color (or color palette) for your wedding party to wear–just think of nails, like dresses, as another way to "create a harmonious look" for
Another low-stress way to navigate the topic: "If you rent out a salon space for a pre-wedding glam party you can easily pick a specific palette for your wedding party to choose from," Hanna recommends. Or, if you're not doing nails with your wedding party, "start a group chat and send photos of specific shades to your bridal party that they can pick from," Hanna says, ideally a range of three to five hues. ("If you pick one singular shade, there's a chance it may not compliment everyone's skin tone or personal preference," she notes.)
3. Forgetting About The Groom's Nails
Grooming logistics like nails can involve the groom, too, depending on the couple's preferences. "I am a huge proponent of grooms getting manicures for their wedding," Hanna says, noting it can "save photographers time on editing if their nails don't look great in photos." A groom's nails glow-up could consist of "a simple cuticle care manicure," per Kim, which, though subtle, "can change the look of the groom's hands" and provide "a clean and hygienic appearance." Or maybe the groom is opting for a "more adventurous" nail aesthetic, in which case Kim recommends the couple discuss what "color and design would look best with the overall theme of the wedding."
4. Biting Your Pre-Wedding Nails
Trying to stop biting or picking nails and cuticles can be tough–especially if wedding planning stress is involved–but it's absolutely possible. We got pro intel on how to conquer the habit, and how far ahead to kick off the process. Hanna recommends starting your nail rehab journey "at least 3 months before the wedding," in order to "give your nails enough time to fully heal so they can look their best on your wedding day. Kim suggests incorporating cuticle oil or hand creams into your day-to-day routine, "to keep their hands and cuticles as moisturized as possible." Wearing acrylics or gel polish for a few months leading up to the wedding so natural nails are covered (and can't be bitten) is one option, per Kim.
But regardless if you opt for gel, acrylic, regular polish, getting consistent manicures of some sort in the months leading up to the wedding are also "a great way to stop biting and picking is to invest in your nail health," Hanna says. That might involve Russian manicures, which Hanna loves and recommends to chronic biters and pickers, "because it eliminates all cuticles so there is nothing left to pick."
5. Not Having a Backup Plan for Potential Mishaps
Unwelcome wedding-day surprises inevitably happen, whether involving a beauty snafu, fashion emergency, or an overserved guest–something will end up not going according to plan, unfortunately, because that's life. But don't stress: Instead, here's how to arm yourself with nail tools and tricks to keep any big day drama at bay.
A nail file and cuticle oil are day-of "essentials," per Kim–"cuticle oil is extremely important and will keep your nails looking amazing the entire day," Hanna says. Both Kim and Hanna recommend having a bottle of regular nail polish (even if you have gel on your nails, Hanna notes) in the exact color handy.
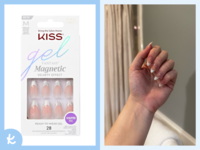
Hanna also suggests topcoat, press-on nails and cuticle nippers be in your day-of arsenal for any necessary touch ups. Press-ons are useful, Kim notes, because they're "easy for the bride to pop on and change the design with ease" if one (or more) of your nails gets seriously chipped or damaged that morning. If you're booking a nail artist for your getting ready glam plans, that's ideal, "since they can bring a kit with everything needed," Hanna says; if not, you can delegate gathering emergency nail essentials to a MOH or bridesmaid.
