


Spice things up with these steamy flicks.
Updated Oct 14, 2024This Is Exactly How to Create Your Wedding Website
Follow our lead—we've got you, babe.

Photo: Stocksy
For whoever needs to hear this: You don't need to be a professional web developer (or to hire one) to create your wedding website. It's true—the process is quite easy, especially if you can reference some solid step-by-step instructions. We're breaking down how to make a wedding website below, covering every single task you should tackle in order, so you know exactly how to use every section of your site to its full potential. It might also be helpful to reference some wedding website examples to see the unique ways that other soonlyweds composed their digital hubs. So boot up your laptop or log into The Knot app, get cozy and make your way through the instructions below.
In this story: Building a Wedding Website at a Glance | How to Make a Wedding Website
Building a Wedding Website at a Glance
Asking yourself: "How do I create a wedding website?" Well, first you come to us. Then you can start exploring wedding website templates and wedding website URL ideas. You can also save this handy infographic that simplifies each step, and pull it up on your phone or Pinterest board when you're ready to create a wedding website.

Design: Ashley Detmering
How to Make a Wedding Website
Let's get into it. Building a wedding website is fun, so don't forget to enjoy the process. After all, when else do you get to sift through your engagement photos, spend hours looking at pretty designs and think about every thoughtful detail you've nailed down so far for your nuptials? See the simple steps for making a wedding website below.
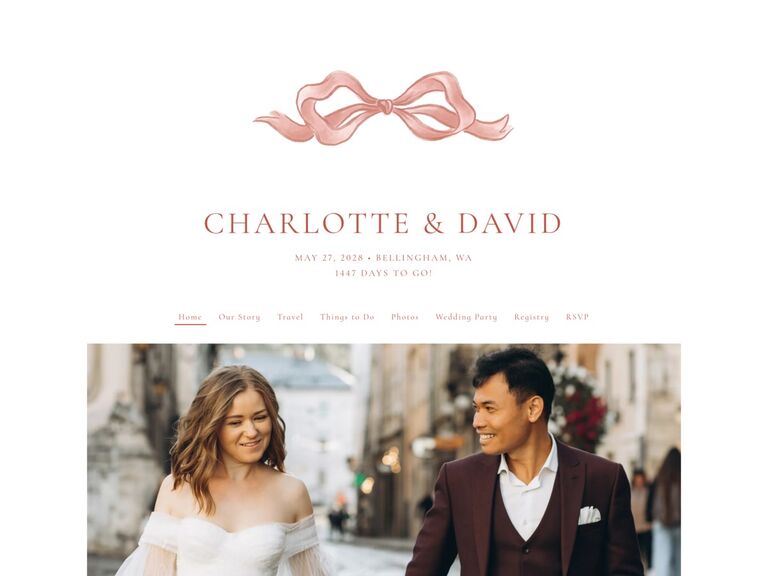
Photo: The Knot
1. Head to Your Wedding Website Platform
We're very partial to our own—it's the perfect balance of polished and user friendly. Once you arrive on The Knot homepage, navigate to the menu bar near the top of the page. Third from the left, you'll see the Wedding Website tab. Give it a click; you should now see a small pop-up menu. Select the text that says "Start a wedding website" next to the tiny pencil icon to begin setting up a wedding website.
FEATURED VIDEO FROM THE KNOT
2. Explore Wedding Website Designs
If you're worried about how to design a wedding website, don't be. While you can customize some details, all of the aesthetic heavy lifting has been done for you. The Knot offers nearly 700 pretty wedding website designs, so you're sure to find one that suits your celebration's look and feel. Scroll around and filter by style, color and season, then select a design that speaks to you. If how your wedding website will look on a phone screen is a deciding factor as you make a The Knot wedding website, hover your cursor over a design you like, then click "See details." This will show an example of the design on both desktop and mobile. Do note, you can always swap designs later on.
3. Add Your Basic Wedding Details
Before you get too wrapped up in writing down hotel block details and wedding party bios, you need to cover the basics as you make your own wedding website. Once you click "See details" on a design, you'll see sections to add you and your partner's names, your wedding date and your wedding location (optional). Click "Continue." You'll be prompted to make an account or sign in to an existing account. Ta da! You should now be looking at your WWIP (wedding website in progress), you can proceed to write and edit every section of your site. If you ever need to return to this view—which displays a preview of your site on the left and an edit tool bar on the right—in the future, you can access it through the "Edit website" section under the Wedding Website tab. This button will appear when you are logged into your account.
4. Choose Your URL
Next up in the "how do you create a wedding website" process: determining your URL. Get creative or keep it simple. Though, we do suggest selecting something easy enough for guests to remember if they misplace the piece of stationery you wrote your site address on. Consider including both of your first names or last names. At the top of the "Edit website" tool bar along the right side of your screen, you'll see a heading labeled "Privacy & URL." Click here and you'll see options to add a password as well as to pen your URL. If you're wondering how much The Knot costs, you won't have to spend a dollar unless you choose to upgrade to a fully custom URL.
5. Edit Your Home Page
Your home page is the first thing guests will see after they punch your URL into the search bar, so don't be afraid to make it warm, welcoming and filled with personality. Edit it under the "Home" section in the edit bar. Your names, wedding date and location do (and should) always appear here, but otherwise, this page is your "create my own wedding website" oyster. You can add a sweet photo, a relationship timeline, a video and more. It's also wise to include your venue and the time of your ceremony on this page to keep it front and center. Additionally, write a sweet welcome message to your guests here to give them the same warm-and-fuzzy feeling that you have right now as you plan your wedding. BTW: You'll see a pink button that says "Save" appear as you edit each individual detail, so your site will be updated with every change you make, not all at once after you're done.
FOR YOU

The Best Wedding Planning Tools & Resources Available
Fun and free wedding planning tools? Yes, please!

Your Guide to Hiring a Wedding Babysitter Near You
Having an adults-only wedding? Provide the ultimate guest amenity by hiring a sitter for the kiddos.

Wedding Dress Code Wording That Makes Sense
It's time for a dress code decode.

Photo: The Knot
6. Add Your Relationship Story
Maybe we're just romantics, but we head right to the "Our Story" page the moment the WWS drops for a couple in our lives. Use this section to talk about how you met, how your proposal went and any other details you'd like to share with guests. It doesn't have to feel formal, just be warm and authentic. Completing this page is also a great opportunity for more-removed guests on the list—like your cousin's plus-one—to get to know you better ahead of the ceremony.
7. Select Some Sweet Photos
How do you make a wedding website without including your favorite snaps from your engagement shoot? Or some precious shots of you two from the early dating years? Use your "Photos" section to give guests a glimpse into your love story. Bonus: Once you curate this sweet digital album, you can scroll through it whenever you want to reflect and feel romantic.
8. Gush Over Your Wedding Party
Once you've introduced yourselves, write some brief biographies for your wedding party. They'll be standing by your side when you say "I do," so take the time and energy to introduce them to the rest of your guests. You can just include their names and roles, or take it up a notch by adding photos and fun facts. Plus, your party people will appreciate the special shout-out.
9. Complete Your Q + A Section
Making a FAQ for your wedding website is integral, as it anticipates and answers questions your guests likely will have, so you won't have to field inquiries (or dozens of calls and texts) as you plan. On The Knot, this section is called Q + A. Here, you can explain your weather contingency plan, your dress code, if children are allowed and so on. If you're still somehow wondering: "Is a wedding website necessary?" I bet you have your answer, seeing how it can save you so much time and stress with communication.
10. Fill Out Your Travel Tab
No matter if your wedding is geographically near or far, some (if not all) of your guests will be traveling to attend. Take some of the prep off their plates by including pertinent details here, like info on hotel blocks, transportation for the wedding day and directions for guests arriving by car, plane or train. The more detailed this travel tab is, the better.
11. Give Your Guests Some Activity Ideas
If you're curating a full-blown wedding weekend, chances are attendees will have some down time to deal with. That's why it's kind to provide your nearest and dearest with a few activity ideas. If you're saying "I do" in your home city, get super personal with your recommendations, directing out-of-town folks to a few must-see spots as well as to the locals-only sites you love. Think: your favorite restaurants and bars, museums, scenic neighborhoods, parks and botanic gardens, etc. If you're heading to a far-flung destination for your nuptials, offer suggestions for places popular with locals and iconic landmarks they can't miss. (Tap any on-site vendors you're using in that location for recommendations.)
12. Ensure Your Registry Is Up and Running
You'll notice that a registry tab is automatically included on your wedding website. Nice, right? Even better: Your The Knot registry will automatically populate on this tab, which means you don't have to do any extra legwork to make your wish list easily accessible to guests looking for gift options. (Also, wedding websites are the primary place for guests to access a couple's registry, just FYI.) Just ensure your registry has a few items displayed for early-bird shoppers—you can add more at any time. Then, exhale with relief knowing that this is another thing you don't have to worry about as you figure out how to start a wedding website.
13. Add Additional Sections and Reorder As You See Fit
We've covered all of the most essential sections we'd recommend including as you set up your wedding website, but you can also add extra pages that outline any extra details you'd like to convey (like a separate and thorough schedule of events in the wedding weekend), or even provide a place for invitees to RSVP digitally. You can also attach custom pages by clicking the blue "Add a Custom Page" text at the bottom of the "Edit website" bar. At the top of the list of pages, you'll also see an option to "Reorder pages" written in blue text. Click this text to arrange the sections of your wedding website in the navigation bar as you'd like, just drag and drop to swap.


