


Spice things up with these steamy flicks.
Updated Oct 14, 202430 Engagement Ring Photos to Hard Launch Your Engagement
If you didn't take the engagement ring pics, did it happen?
Taking beautiful engagement ring photos is a true art form. Snapping a ring pic is one of the first things we do right after saying yes. And how can you not, when you've been gifted such a gorgeous sparkler from the one you love? And in the age of Instagram and TikTok, it's one of the easiest ways to hard launch the exciting news. Of course, we always recommend telling your friends and family about the proposal first before spreading the word online. (It is proper engagement etiquette, after all.) But once your loved ones are in the loop, we're all about snapping an engagement ring selfie to show off your new bling. Below, I've curated 30 fun engagement ring photo ideas (with pictures included!) so you can easily create your perfect social media engagement announcement. (Psst: We also have plenty of cute engagement caption ideas if you need those too.)
And to help you create the perfect shot, I sought expert advice from The Knot's own social media coordinators, Kerre Jo Lattanzio and Meghan Ho. Save your favorite snaps below on Pinterest and recreate them on your own feed—and don't forget to tag and follow @TheKnot and @TheKnotProposals so we can see your best engagement ring pics!
30 Ideas for Engagement Ring Photos and Poses
If you happen to need a few engagement ring photo ideas, I've got you covered. Engaged at Disney? Snap an engagement ring photo in front of the castle. Or if you're a pet parent, incorporate your furry friend into the selfie shot. The possibilities are endless when it comes to engagement ring pics and poses, but here are 30 ideas to get you started:
With a Fresh Mani
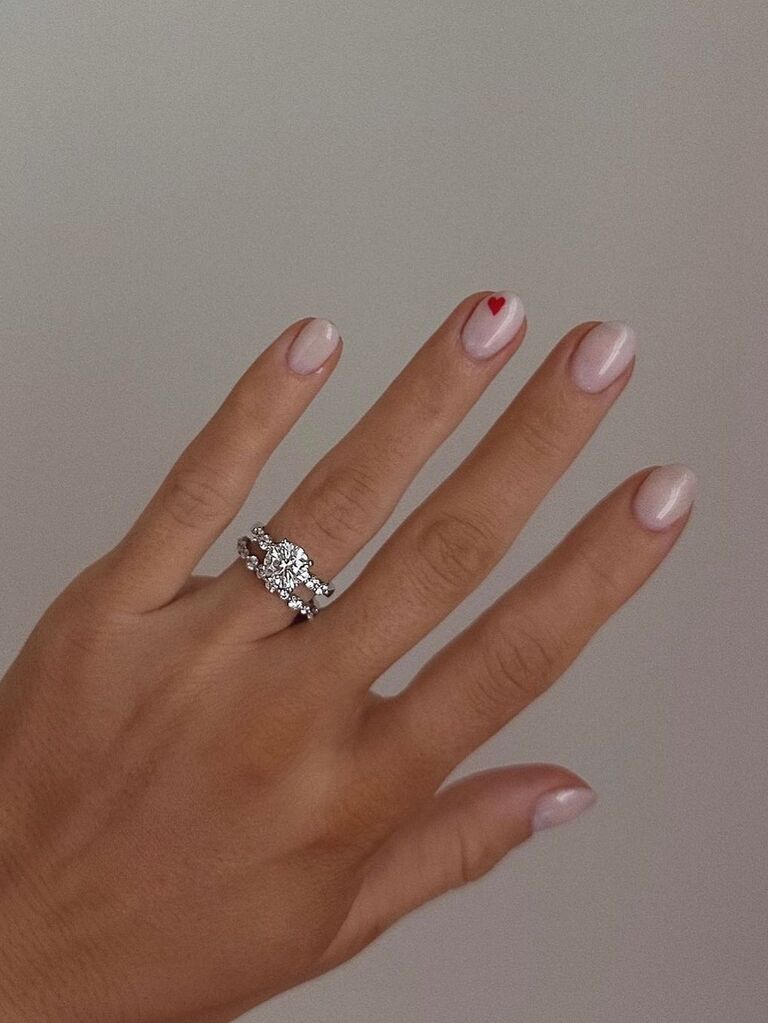
Photo: @jameallenrings
When it comes to engagement ring photo ideas, it doesn't get more classic than a selfie showing off a fresh manicure. Your hands will get plenty of attention once you're engaged, after all, so treat yourself to a great manicure to flaunt while showing off your new bling. (Pro tip: This is also a great chance to test out potential wedding day nail styles too.)
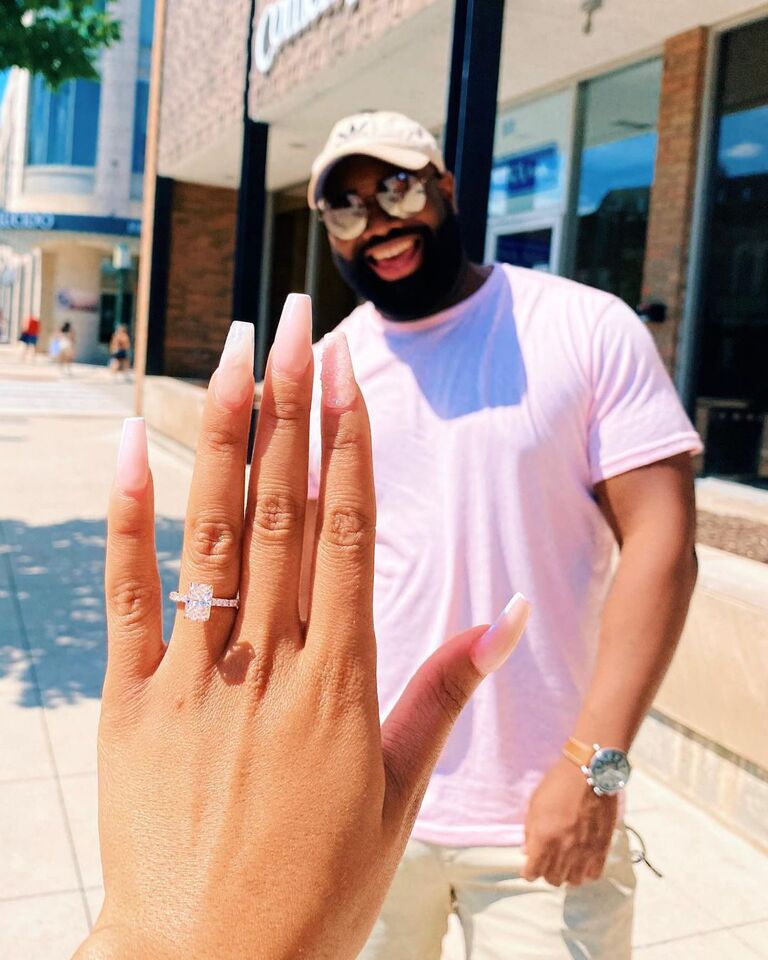
With Your S.O.
It takes two to get engaged, so we love this couple engagement ring selfie idea. Once your sparkler is securely on your finger, throw your hand up in front of your S.O. and snap a pic—it's simply perfect for the 'gram.
FEATURED VIDEO FROM THE KNOT
Showing Off Your Pet
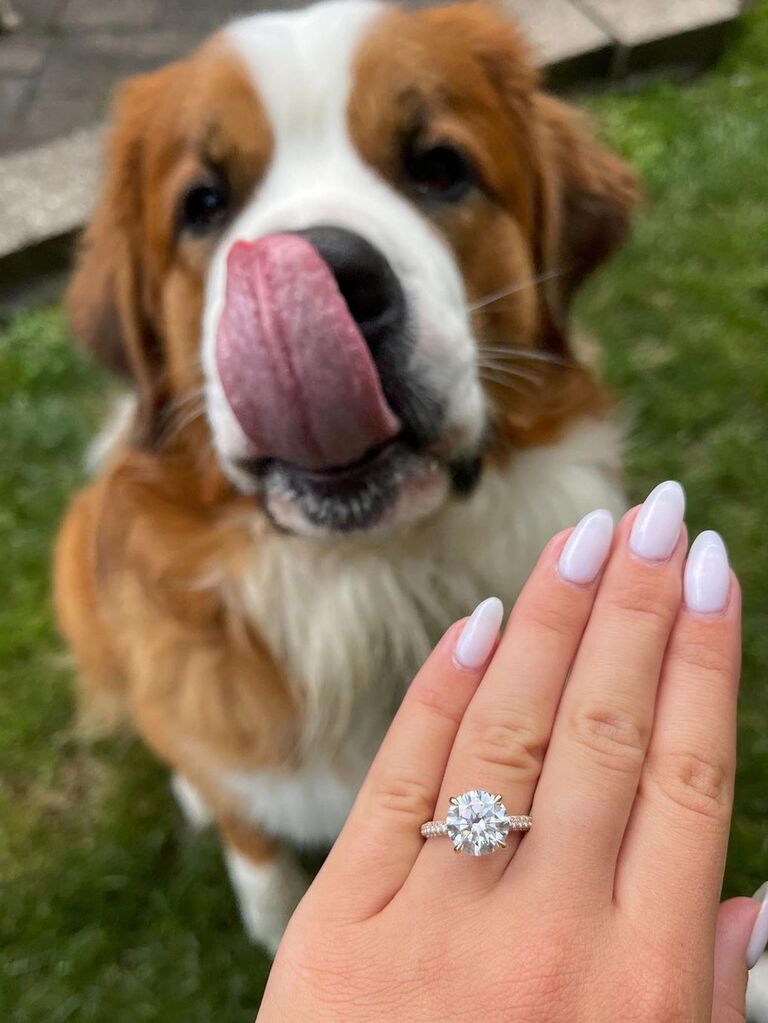
Photo: @jamesallenrings
Who says your beloved pet can't get in on the action? We have a feeling that an engagement ring selfie featuring your dog or cat in the background will get all the likes.
Grab a Slice of Pizza
Pizza and diamonds? That's amore. If you're celebrating your proposal with a pie, ask your partner to snap of a pic of your sparkly hand grabbing a slice for an iconic ring selfie.
On the Water

Photo: @adiamordiamonds / @senoritalindav
Rivers, oceans, lakes, the coast of Italy—all bodies of water make for pretty ring selfie backdrops. If you find yourself in a particularly scenic locale, grab an engagement ring selfie showing off your bling to level up your IG feed.
Ring Fingers Up
We love this ring selfie idea for your wedding day—throw those ring fingers in the air to document your *just married* status.
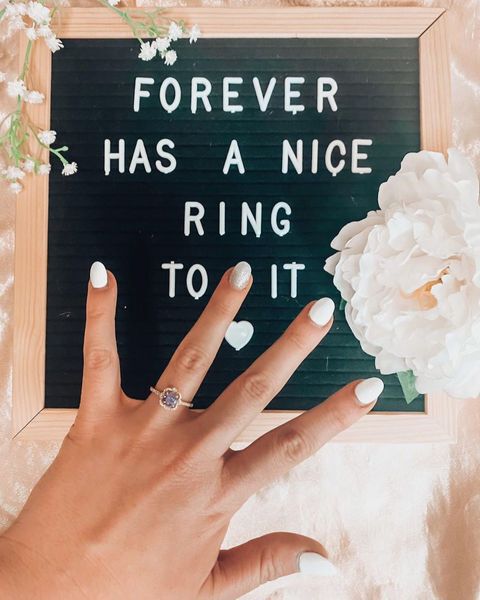
In Front of a Letter Board
Those who are dedicated to updating their letter boards will appreciate this engagement ring photo idea. After you say yes to your S.O., update your sign to reflect your "just said yes" status—it'll make for an epic engagement announcement. (Need a letter board idea? Try one of these cute wedding countdown quotes.)
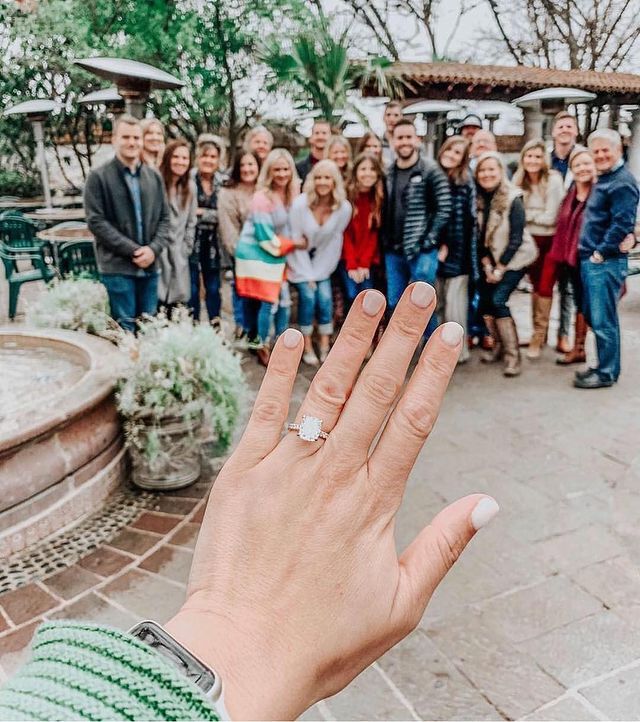
With Your Friends and Fam
Perfect for couples getting engaged in the presence of loved ones, this heartfelt engagement ring selfie pose will tug at everyone's heartstrings.
With your Favorite Bridal Mickey Ears

Photo: @jacquelinenfay
Calling all Disney brides! This engagement ring photo idea was made for you. Just throw on a pair of your favorite bridal Mickey ears, and you'll be ready to snap a selfie of your happily ever after.
In Front of Your Proposal Spot
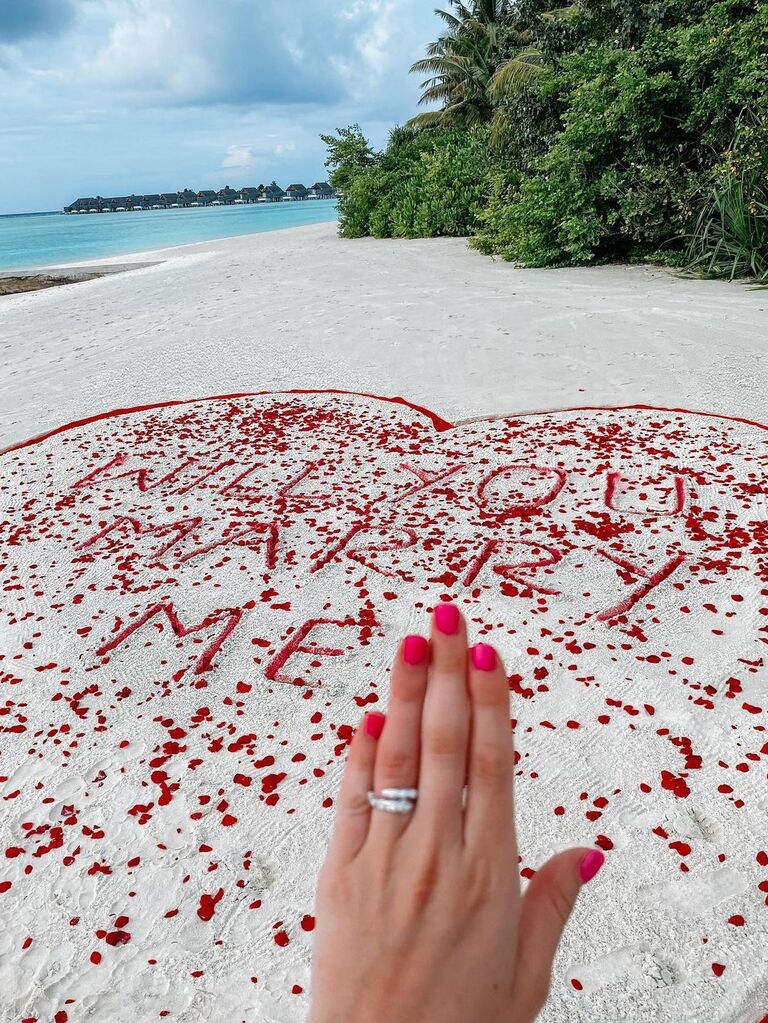
Photo: @fashioninmysoul
If your partner pulled out all the stops for the proposal, don't forget to grab a ring selfie of the setup—it's one photo you'll definitely want to take amid all the excitement.
In the Snow
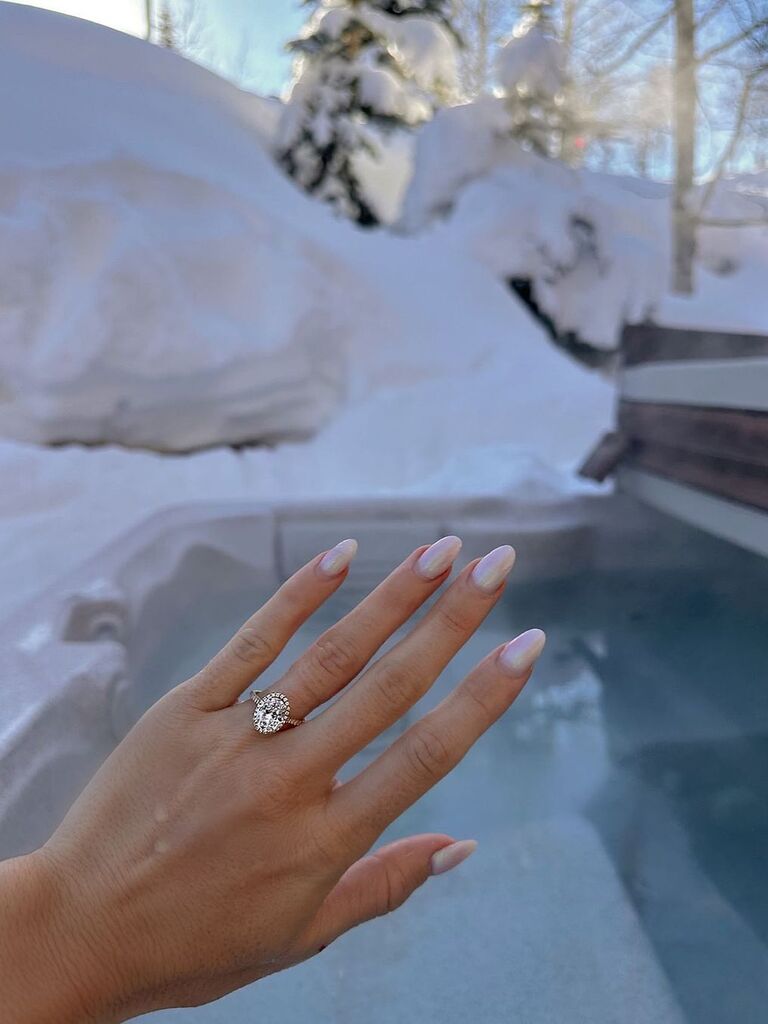
Photo: @jamesallenrings
What's icier, your ring, or this frosty backdrop? Snow bunnies will love this fun engagement ring photo idea for when the weather cools down.
At Dinner

@TheKnot/Instagram
,@gulisgulkaya/Instagram
You don't have to get engaged over dinner to take this super cute ring selfie. (But if you do, make sure you get a photo like this!) Once you're seated, hold out your hand with your ring on full display, and have your partner take the photo from their point of view.
Have your Cake

Photo: @jamesallenrings
How sweet it is to take an engagement ring pic with an adorable heart-shaped cake! Pose for a ring selfie next to your favorite sweet treats—and don't forget to treat yourself after you snap your photo!
FOR YOU
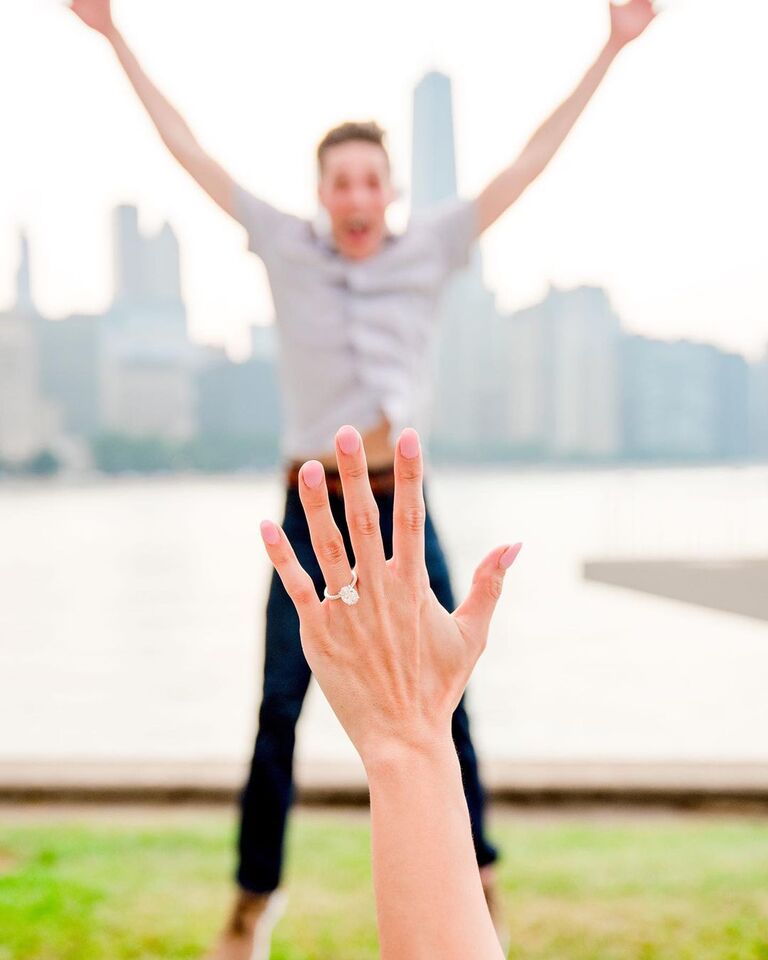
Jumping for Joy
We have a feeling your S.O. will *literally* be jumping for joy after you accept their proposal, which is why we're obsessed with this couple engagement ring selfie.
Framed by Flowers
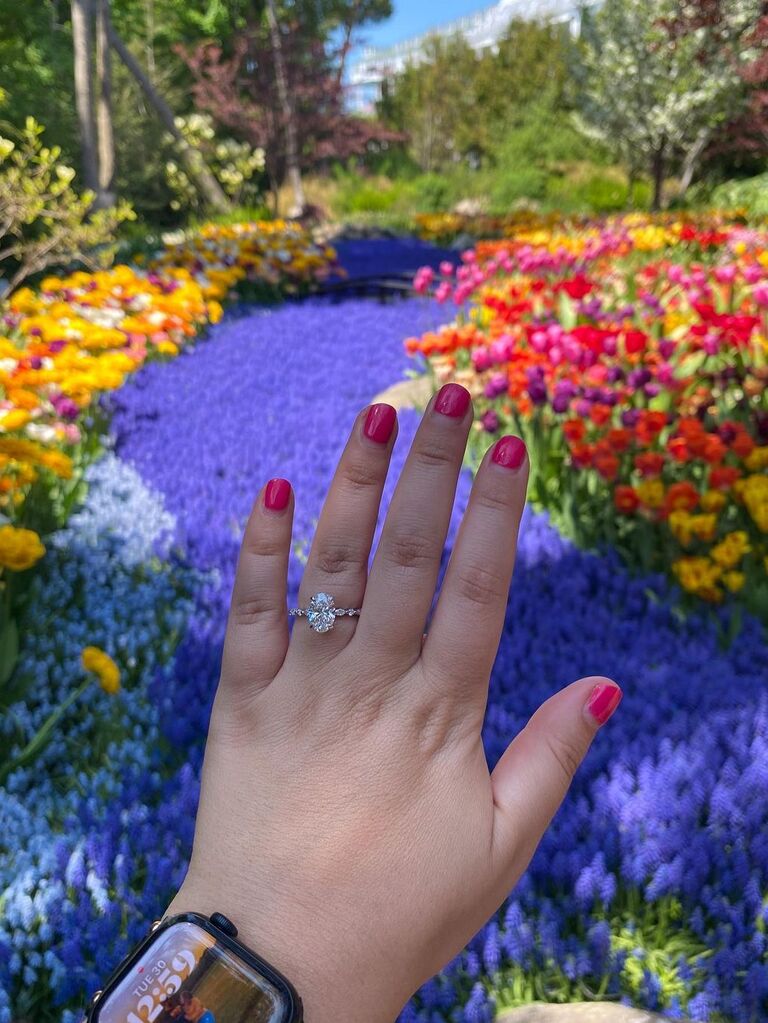
Photo: @co_emiley
If you're looking for an aesthetically pleasing ring selfie idea to complement your IG feed, consider this. Find a colorful display of fresh flowers for your engagement ring pics and snap away.
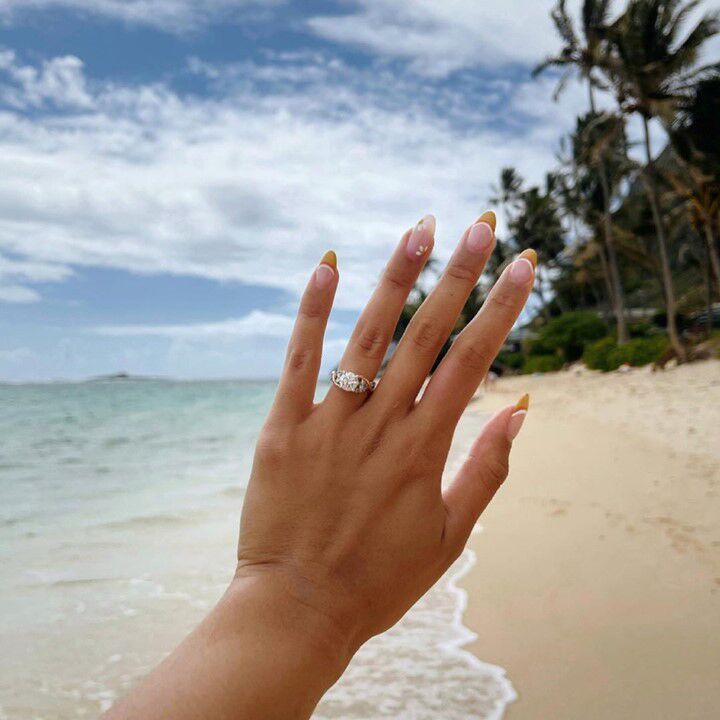
In a Tropical Hideaway
If you'll be jetting off on a tropical engagement-moon to celebrate your happy news, be sure to snap a ring selfie like this while soaking up the sun.
Rock On

Photo: @dancingwithher
Rock isn't just a genre; it's a lifestyle (and a pretty sparkler on your finger) Show off your bling and your love for rock n' roll with this super fun engagement ring photo idea to show off your engaged status.
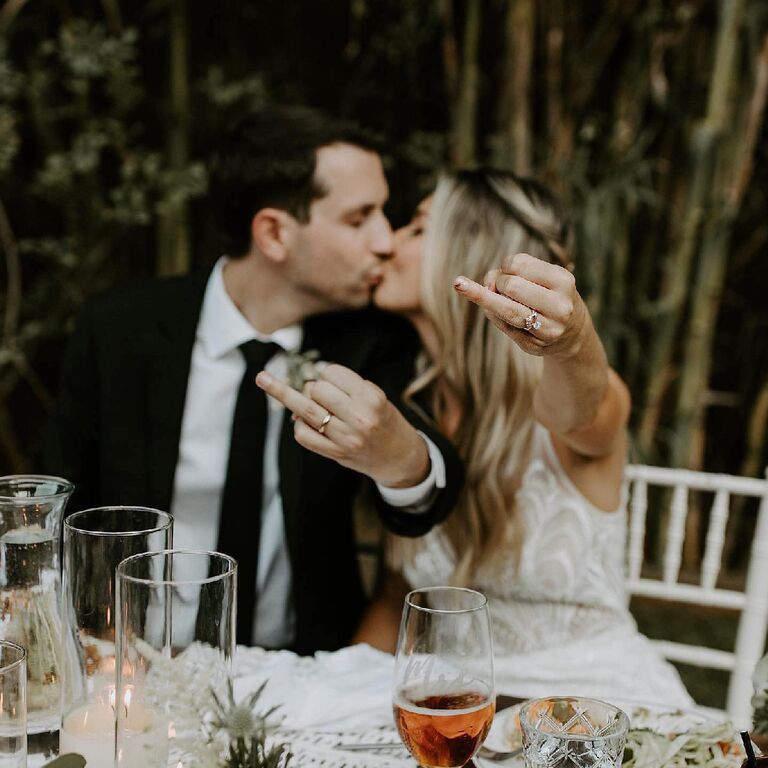
Sealed With a Kiss

Photo: @katelynkristinephotography / @theknotproposals
If you don't mind a little PDA on your Insta feed, this couple engagement ring selfie idea is simply perfect for lovebirds.
Holding Hands
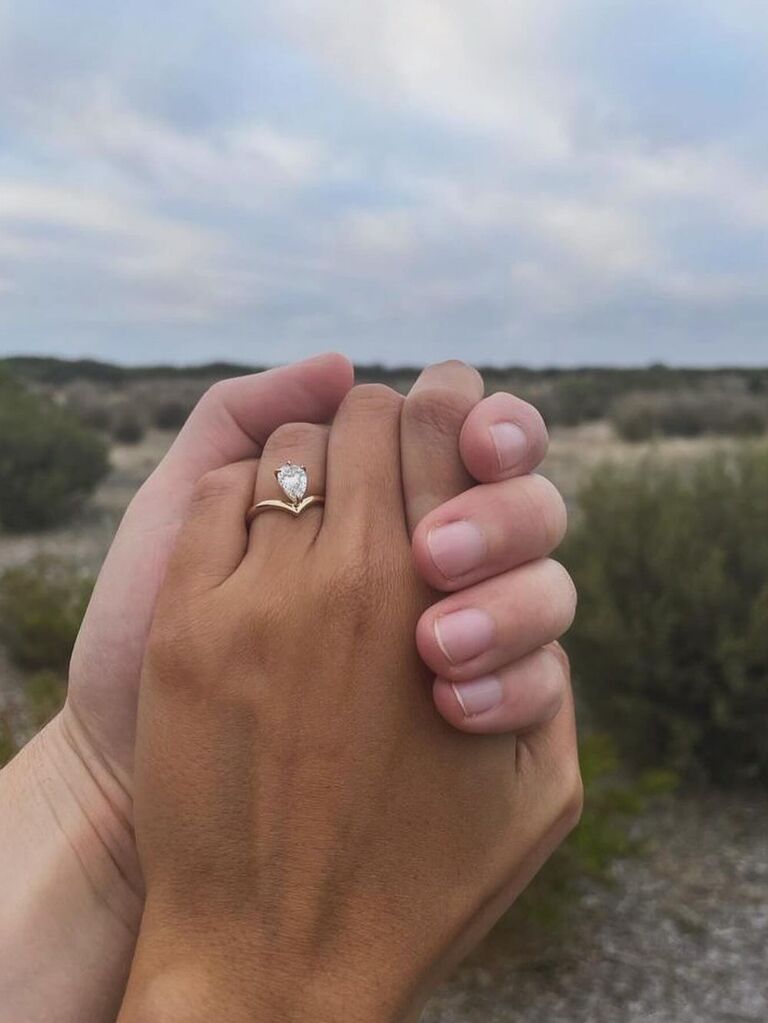
Photo: @kateandkole
Next time your hand is wrapped up in your partner's, take this cute engagement ring selfie—it's an easy, no-fuss pose that'll look so cute on the 'gram.
If the Shoe Fits
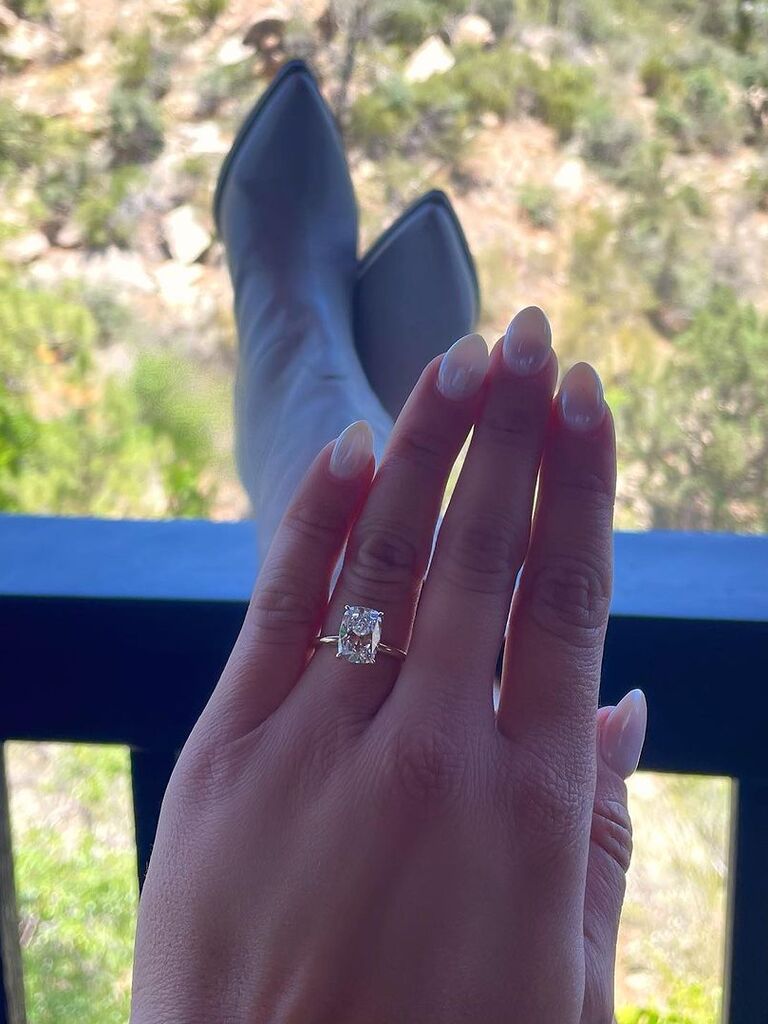
Photo: @adiamordiamonds
Move over Cinderella! Whether you prefer boots, heels, or sneakers, they are sure to look good with your gorgeous new sparkler. Next time you find yourself distracted by your bling (and your shoes), snap a quick ring engagement pic.
At Magic Kingdom
Disney lovers, this one's for you. If you have a soft spot for magic and fairy tales, it only makes sense that you need to take your sparkler to Magic Kingdom for a romantic photo opp.
In Front of a Landmark
World travelers and history buffs alike will appreciate this engagement ring photo idea. Next time you find yourself in front of a historical landmark, throw your hand in the air for a ring selfie set against a memorable background.
With a Ring Stack
Your engagement ring doesn't have to be the only bauble in your selfie. If you love curating eclectic ring stacks, throw on your favorite bands to accent the star of the show.
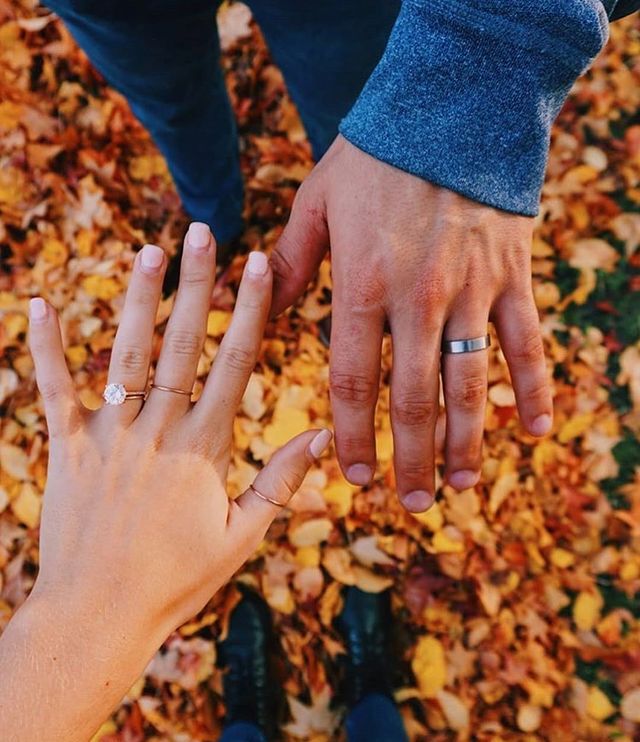
Above Autumn Leaves
Cue the Gilmore Girls theme song. Autumn is a prime time for Instagram photos, so once the leaves start changing colors be sure to snap an engagement ring selfie in front of your favorite landscapes.
In Front of Holiday Decor
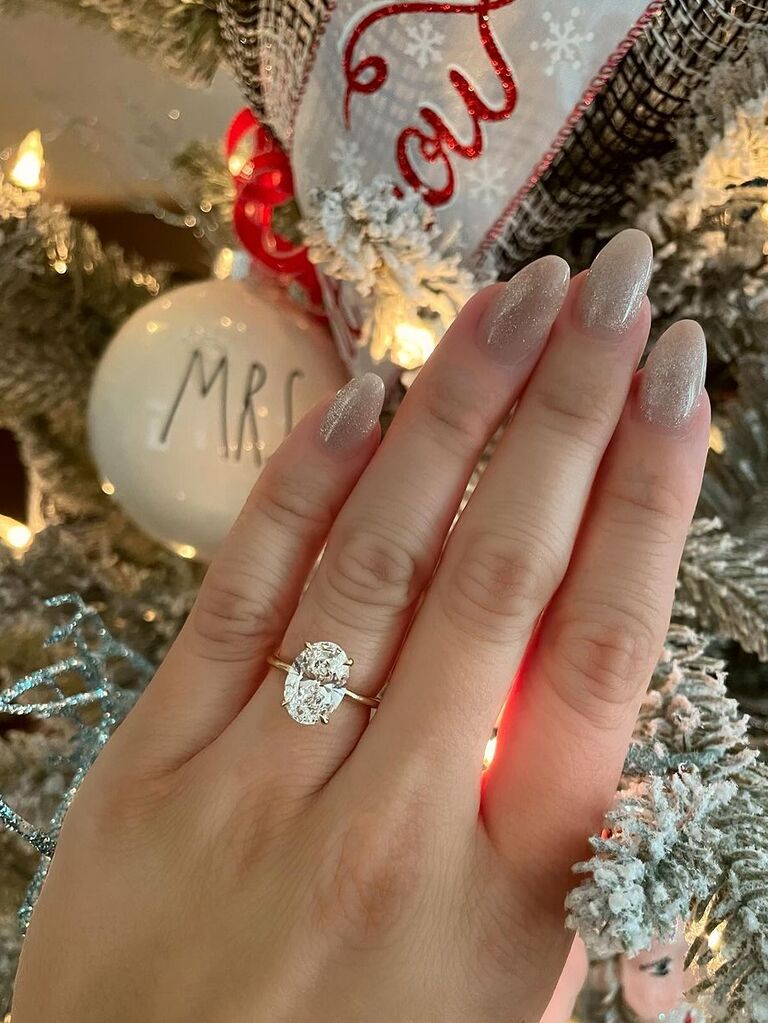
Photo: @adiamordiamonds
Did you know that nearly 40% of couples get engaged between November and February? It's true—and it's why we've dubbed this time of year "proposal season." If you happen to get engaged while your holiday decor is out, trust us when we say you should definitely snap an engagement ring pic or two showing off your sparkler in front of a Christmas tree or a festive lights display.
With your Passport

Photo: @campbellhuntpuckett
There's no better place to be than with your new fiance. So if you're traveling abroad, snap an engagement ring selfie with your passports before you jet off.
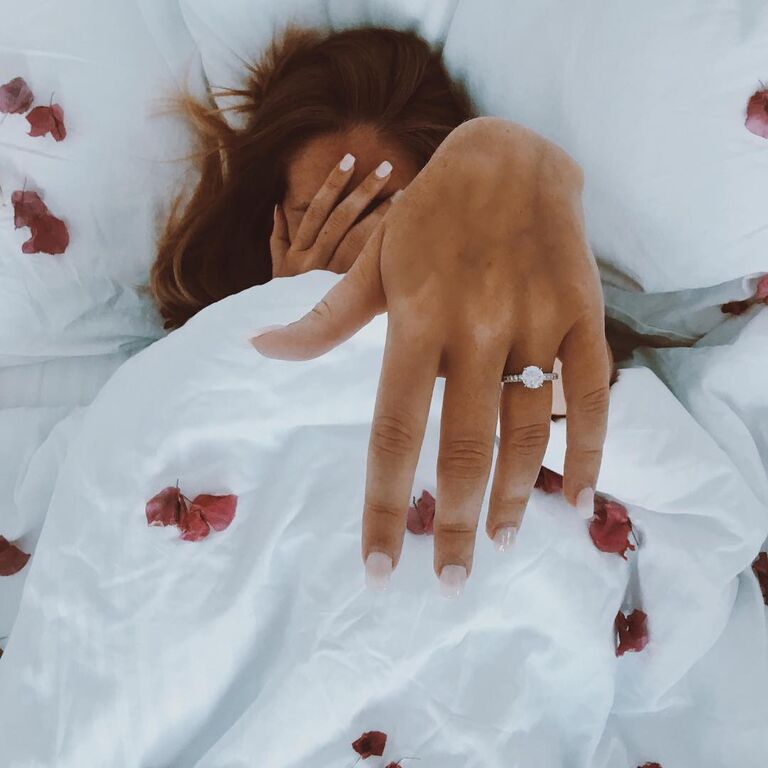
Under the Covers
Consider this one of our engagement ring photo ideas. Ask your fiancé to snap a photo of you showing off your bling from the comfort of your bed underneath the covers. (Bonus points if you add rose petals!)
With Your Favorite Drink
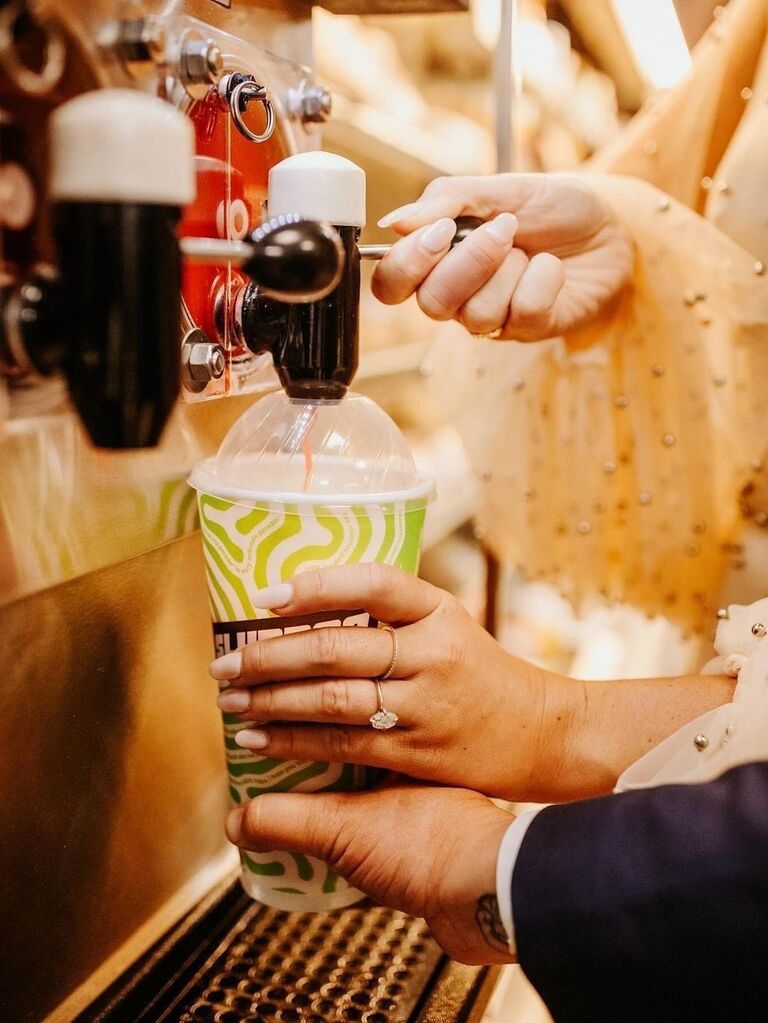
Photo: @blackbird_and_rye / @theknotproposals
Looking for fun engagement ring photo ideas that are personal to you and your partner? Take your ring pics with your favorite date night spot, drink or treat. I can't get over how cute this slurpee snap is!
Resting on Your Jeans
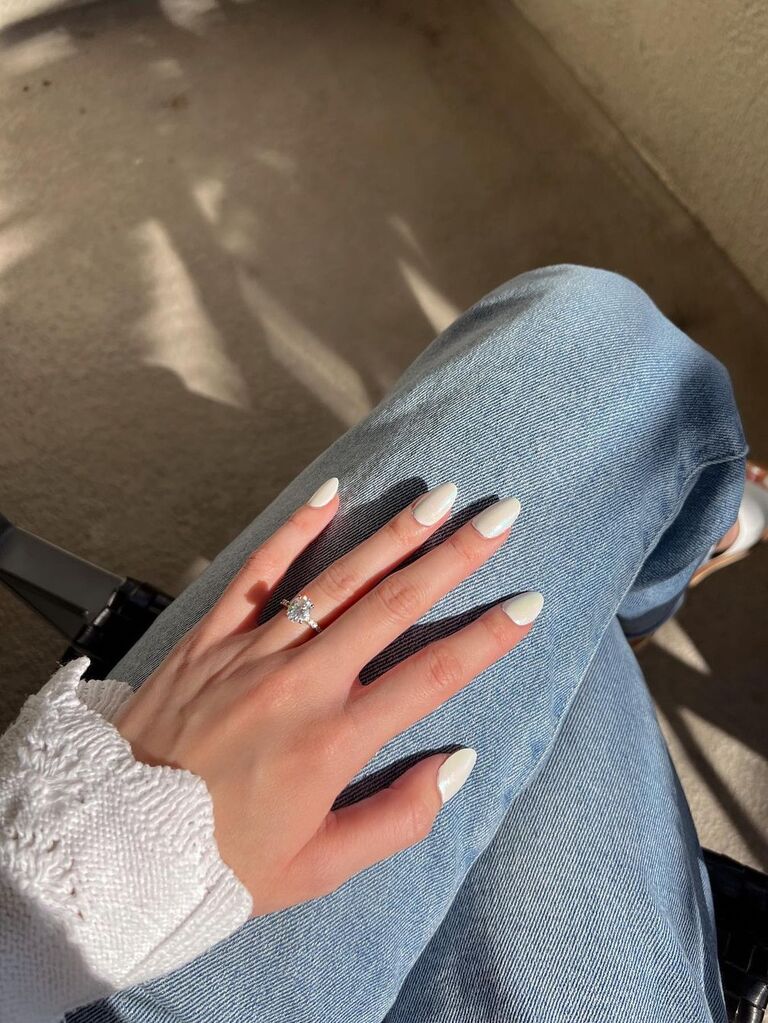
Photo: @kaitlynlauren
Just engaged and want your ring to pop? We don't blame you. Take a photo of your engagement ring resting on your jeans or outfit. And after you post the 'gram, you might as well make an account on The Knot to make your wedding planning process a breeze. (Thank us later.)
By the Pool
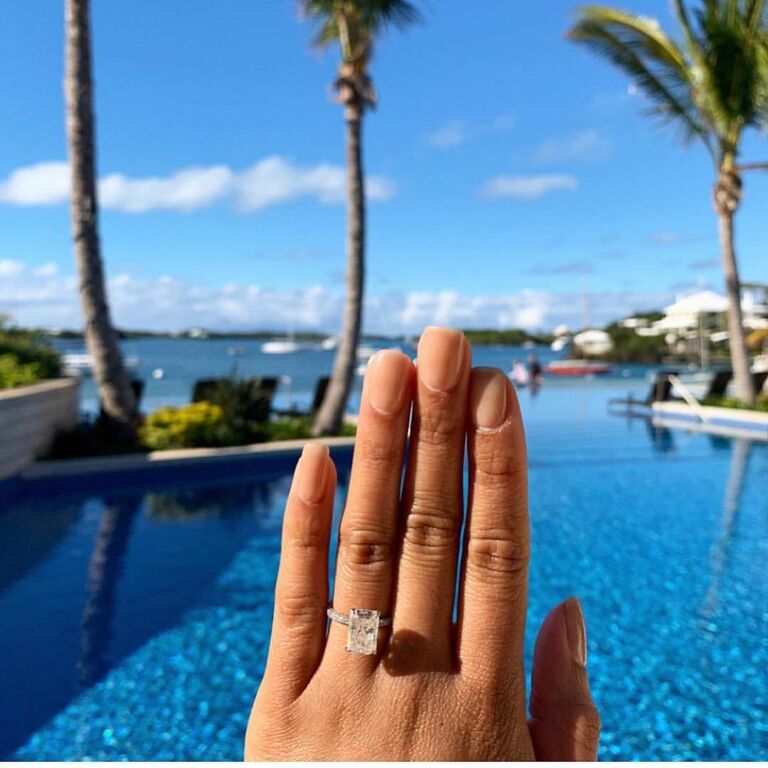
Photo: @_goingbacktocallie
There's no better place to be in the summer than poolside. Next time you're lounging in the sun, grab an engagement ring selfie by the water.
Selfies and Self-Care
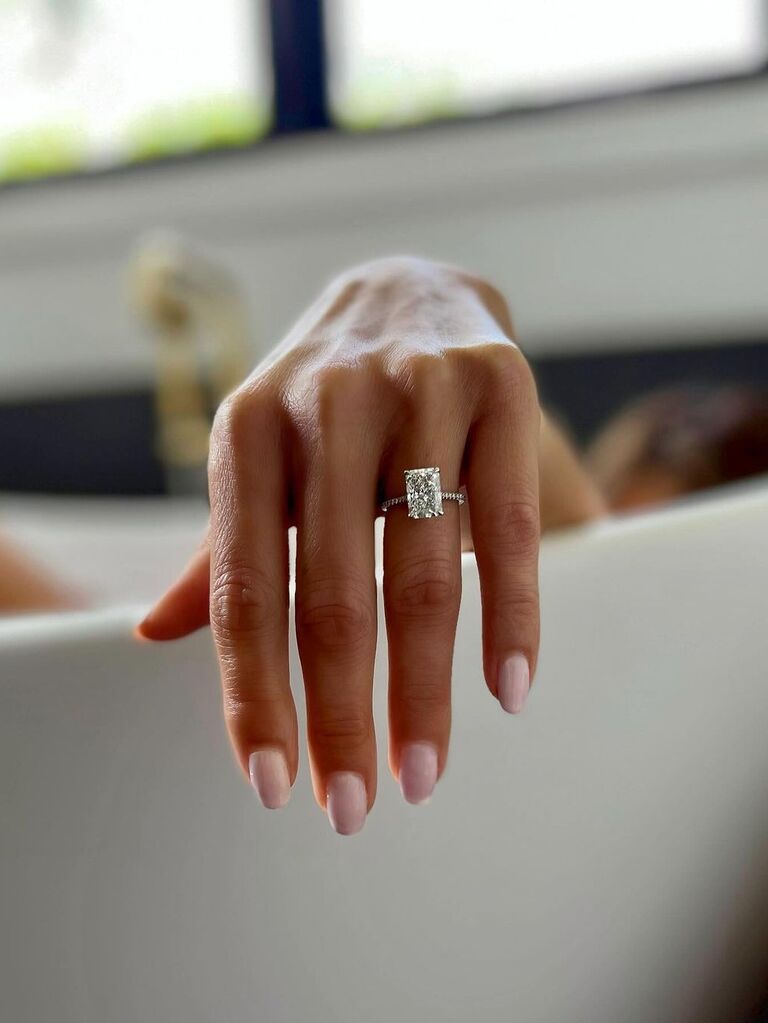
Photo: @adiamordiamonds
There is nothing like a little self-care and sparkle! If you're in a tropical destination with one of those free-standing tubs, then you have the perfect opportunity to snap some luxury engagement ring photos that everyone will be talking about.
Tips for Taking Your Own Engagement Ring Pics
If there's anything that the above photos show, it's that taking engagement ring pictures is an art form. You have to consider all the details, from the lighting and camera angle to the backdrop and scenery. Here are some tips from our own resident social media experts that will help you take the best engagement ring pictures that are totally Instagram-worthy:
- Close-ups are key. The goal is to showcase your beautiful ring! Capture close-up shots that highlight the intricate details and sparkle. For an added touch, Lattanzio recommends you ask your photographer to include shots of the proposal box. These photos will help tell the complete proposal story. "Our personal favorite shots are close-ups that capture the couple's emotions and the ring, but showcasing your new bling in your partner's hand is also a more casual option that is pretty to look at," she says.
- Adjust your camera settings before you snap the picture. When you have your hand in the position you want (whether it be a close-up image or a full shot of your hand), Ho explains that you should tap on the ring so your camera knows to focus on it (you should see a square pop up wherever you tap). There should also be a sun icon next to the square. Hold down the sun icon and move it up and down to adjust the lighting around your focus area. Then snap the photo when you're satisfied with your lighting and focus! For those shots that feature just your hand and ring, Ho recommends using portrait mode for a higher resolution. Swipe right on the camera app, select portrait mode, and explore different light settings such as studio light, natural light, contour light and more. Have fun and see which setting brings out the best in your ring.
- Get creative. Why not showcase the setting of your proposal or even your partner in the background? "Setting the scene in your engagement ring photo will be amazing for you to look back on, and it'll be perfect for you to show people!" Ho says. To nail the shot, Ho says to position your hand towards the bottom-left area of the camera to allow enough room for the background visuals. To capture more of the scene, use the 0.5x camera for a wider angle.
- Choose a timeless outfit and nail color. Remember, these photos will be cherished and shared for a lifetime. "A timeless outfit and a well-manicured nail color will ensure your engagement ring takes center stage," Lattanzio says. "Neutrals are a classic, and they never go out of style."
- Embrace props, pets, and scenic views. Are you feeling camera shy or a little stiff in front of the lens? Lattanzio has just the thing for getting comfortable in front of the camera. "Allow props like champagne or your furry friend to bring good vibes to the photoshoot," she says. "From there, you can let your natural happiness do the talking. Don't forget to show off your ring while toasting or playing with your pet in front of the camera!


